How to Set Up an NFS Server on Windows
If you are looking to set up an NFS server on Windows, you are in the right place! NFS (Network File System) is a distributed file system protocol that allows you to share files and directories between multiple computers over a network. Setting up an NFS server on Windows can be a great way to easily share files and resources with other devices in your network.
In this guide, we will walk you through the steps to set up an NFS server on Windows. Whether you want to share files with your colleagues in the office or access files from your home network, setting up an NFS server on Windows will make file sharing a breeze.
Step 1: Install the NFS Server Feature
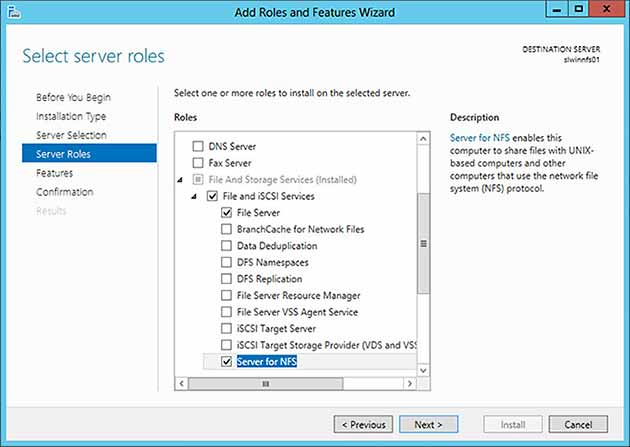
The first step in setting up an NFS server on Windows is to install the NFS server feature. To do this, follow these steps:
- Open the Control Panel on your Windows machine.
- Click on “Programs”.
- Under “Programs and Features”, click on “Turn Windows features on or off”.
- Scroll down and check the box next to “Services for NFS”.
- Click “OK” to install the NFS server feature.
Step 2: Configure the NFS Server
Once you have installed the NFS server feature, the next step is to configure the NFS server. Here’s how you can configure the NFS server:
- Open the Services for Network File System window.
- Click on the “Server Settings” tab.
- Under “Server Options”, select the “Enable NFS sharing” checkbox.
- Click on “Apply” to save your settings.
By configuring the NFS server, you are now ready to start sharing files with other devices on your network.
Step 3: Create NFS Shares
Now that you have set up and configured the NFS server, the final step is to create NFS shares. NFS shares allow you to specify which files and directories you want to share with other devices on your network. Follow these steps to create NFS shares:
- Open the NFS Sharing tab in the Services for Network File System window.
- Click on the “Add” button.
- Select the folder or drive that you want to share.
- Specify the permissions for the NFS share.
- Click on “OK” to create the NFS share.
With NFS shares set up, you can now easily access and share files with other devices on your network.
Conclusion
Setting up an NFS server on Windows is a simple and effective way to share files and resources with other devices on your network. By following the steps outlined in this guide, you can easily configure your NFS server and start sharing files in no time. Whether you are working in an office environment or simply want to access files from your home network, setting up an NFS server on Windows will simplify your file sharing needs.
We hope this guide has been helpful in assisting you with setting up an NFS server on Windows. If you have any questions or need further assistance, feel free to reach out to our support team. Happy file sharing!
