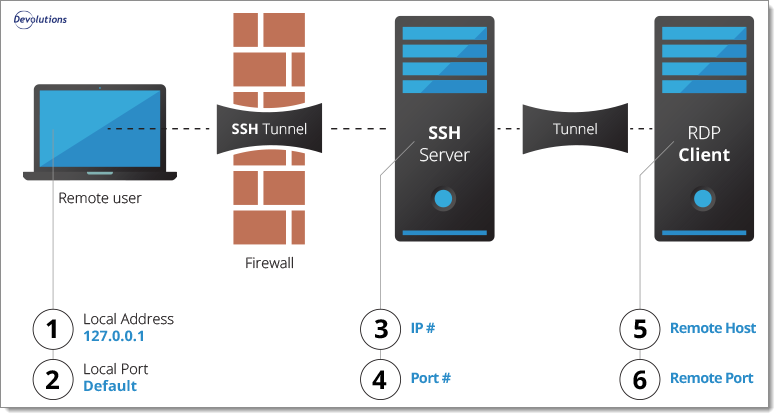
Setting up an SSH Tunnel
As cybersecurity becomes more critical than ever, setting up an SSH tunnel is a vital step in securing your network connections. SSH, or Secure Shell, is a cryptographic network protocol that allows for secure communication over an unsecured network. By creating a tunnel with SSH, you can securely transmit data between two devices, even over a public network like the internet.
Setting up an SSH tunnel may seem daunting at first, but with the right guide, it’s a straightforward process. In this article, we’ll walk you through the steps to set up an SSH tunnel on your system.
Step 1: Install OpenSSH
The first step in setting up an SSH tunnel is to ensure that you have OpenSSH installed on your system. OpenSSH is a free implementation of the SSH protocol that provides encryption for your network connections. Most Linux distributions come with OpenSSH pre-installed, but if you’re using a different operating system, you may need to install it manually.
To install OpenSSH on a Linux system, you can use the package manager specific to your distribution. For example, on Debian-based systems like Ubuntu, you can use the following command:
sudo apt-get install openssh-server
For Windows users, you can download OpenSSH from the official website or use a third-party tool like Git Bash, which comes with OpenSSH pre-installed.
Step 2: Configure SSH
Once you have OpenSSH installed, the next step is to configure SSH on your system. This involves generating SSH keys, setting up a configuration file, and defining the tunnels you want to create.
To generate SSH keys, you can use the following command:
ssh-keygen -t rsa
This command will generate a public and private key pair that you can use for authentication. The private key should be kept secure on your system, while the public key can be shared with others.
Next, you’ll need to edit the SSH configuration file located at ~/.ssh/config. In this file, you can define the tunnels you want to create, specifying the source and destination ports.
For example, to create a local port forwarding tunnel that forwards traffic from port 8080 on your local machine to port 80 on a remote server, you can add the following lines to your SSH config file:
Host remote-server
    HostName remote-server.com
    LocalForward 8080 localhost:80
Step 3: Establish the SSH Tunnel
With OpenSSH installed and configured, you can now establish the SSH tunnel by connecting to the remote server. To do this, you can use the following command:
ssh -f -N remote-server
This command connects to the remote server in the background without executing any commands (-N) and without opening a shell (-f). Once the tunnel is established, you can start transmitting data securely through the encrypted connection.
Setting up an SSH tunnel is a crucial step in securing your network connections and protecting your data from eavesdroppers. By following the steps outlined in this article, you can set up an SSH tunnel on your system and enjoy the benefits of secure communication over unsecured networks.
Remember to keep your SSH keys secure and regularly update your SSH configuration to ensure maximum security for your network connections. With an SSH tunnel in place, you can rest assured that your data is safe and encrypted, no matter where it travels.
