How to Set DNS Manually
Setting your DNS (Domain Name System) manually can help improve your internet speed, security, and privacy. In this guide, we will walk you through the steps to set DNS manually on your device.
Why Should You Set DNS Manually?
When you connect to the internet, your device automatically uses the DNS servers provided by your ISP (Internet Service Provider). However, these default DNS servers may not always be the fastest or most secure option available. By setting DNS manually, you can choose DNS servers that are faster, more secure, and privacy-focused.
How to Set DNS Manually on Windows
Follow these steps to set DNS manually on a Windows computer:
- Press Win + R keys to open the Run dialog box.
- Type
ncpa.cpland press Enter. - Right-click on your network connection and select Properties.
- Double-click on Internet Protocol Version 4 (TCP/IPv4).
- Select Use the following DNS server addresses.
- Enter your preferred DNS server addresses and click OK.
How to Set DNS Manually on Mac
Here’s how you can set DNS manually on a Mac:
- Click on the Apple menu and select System Preferences.
- Click on Network and select your network connection.
- Click on Advanced and go to the DNS tab.
- Click on the + button to add a new DNS server.
- Enter your preferred DNS server addresses and click OK.
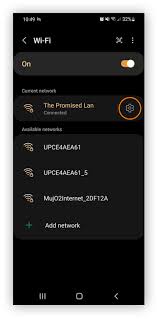
How to Set DNS Manually on Android
If you want to set DNS manually on an Android device, follow these steps:
- Go to Settings and tap on Network & Internet.
- Tap on Private DNS and select Private DNS provider hostname.
- Enter your preferred DNS server hostname and tap Save.
Conclusion
Setting DNS manually can offer you more control over your internet connection. By choosing faster, more secure, and privacy-focused DNS servers, you can enhance your browsing experience. Give it a try and see the difference it makes!
