Rackspace Webmail Outlook Setup
Setting up Rackspace webmail in Outlook is a simple process that can greatly improve your workflow and efficiency. By syncing your Rackspace email account with Outlook, you can access all your emails, contacts, and calendar events in one convenient location. Follow the step-by-step guide below to set up Rackspace webmail in Outlook.
Step 1: Open Outlook
If you haven’t already, download and install Outlook on your computer. Once installed, open the application to begin the setup process.
Step 2: Add Account
Click on the “File” tab in the top left corner of the Outlook window. Select “Add Account” to start setting up your Rackspace webmail account.
Step 3: Manual Setup
Choose the option for manual setup or additional server types. Select “POP or IMAP” when prompted for the account type.
Step 4: Account Information
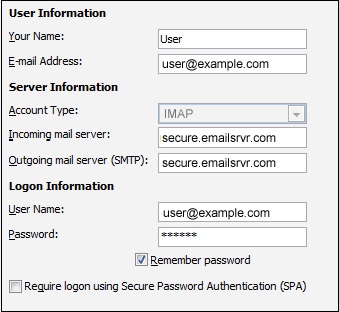
Enter your name, Rackspace email address, server information, and login credentials. The incoming server will be “secure.emailsrvr.com,” and the outgoing server will be “secure.emailsrvr.com.”
Step 5: More Settings
Click on the “More Settings” button and go to the “Outgoing Server” tab. Check the box that says “My outgoing server (SMTP) requires authentication” and select “Use same settings as my incoming mail server.”
Next, go to the “Advanced” tab and change the incoming server port to 993 for IMAP or 995 for POP. The outgoing server port should be 587.
Step 6: Test Account Settings
Once you have entered all the necessary information, click on the “Test Account Settings” button to ensure that Outlook can connect to your Rackspace webmail account successfully.
Step 7: Finish Setup
If the test is successful, click “Next” and then “Finish” to complete the setup process. You should now see your Rackspace webmail account in Outlook and be able to send and receive emails through the application.
Enjoy Seamless Integration
Setting up Rackspace webmail in Outlook allows you to enjoy seamless integration between your email account and desktop application. With all your emails, contacts, and calendar events in one place, you can stay organized and productive throughout your day.
Follow the steps outlined above to set up your Rackspace webmail account in Outlook and start reaping the benefits of streamlined communication.
