Creating a New User in phpMyAdmin for Your Database
If you’re looking to create a new user for your database in phpMyAdmin, you’ve come to the right place. This guide will walk you through the steps of adding a new user and granting them the necessary permissions to access your database.
Before we begin, it’s important to have a basic understanding of how databases work and the different user roles that can be assigned. A database is a collection of organized data that can be accessed and managed by a computer system, while a user is an individual who interacts with the database. In phpMyAdmin, users can be assigned various roles, such as administrator, developer, or read-only.
Step 1: Accessing phpMyAdmin
The first step in creating a new user for your database is to access phpMyAdmin. This can typically be done by navigating to your web hosting control panel and clicking on the phpMyAdmin icon. Once you’re in phpMyAdmin, you’ll need to select the database that you want to add a new user to.
Step 2: Adding a New User
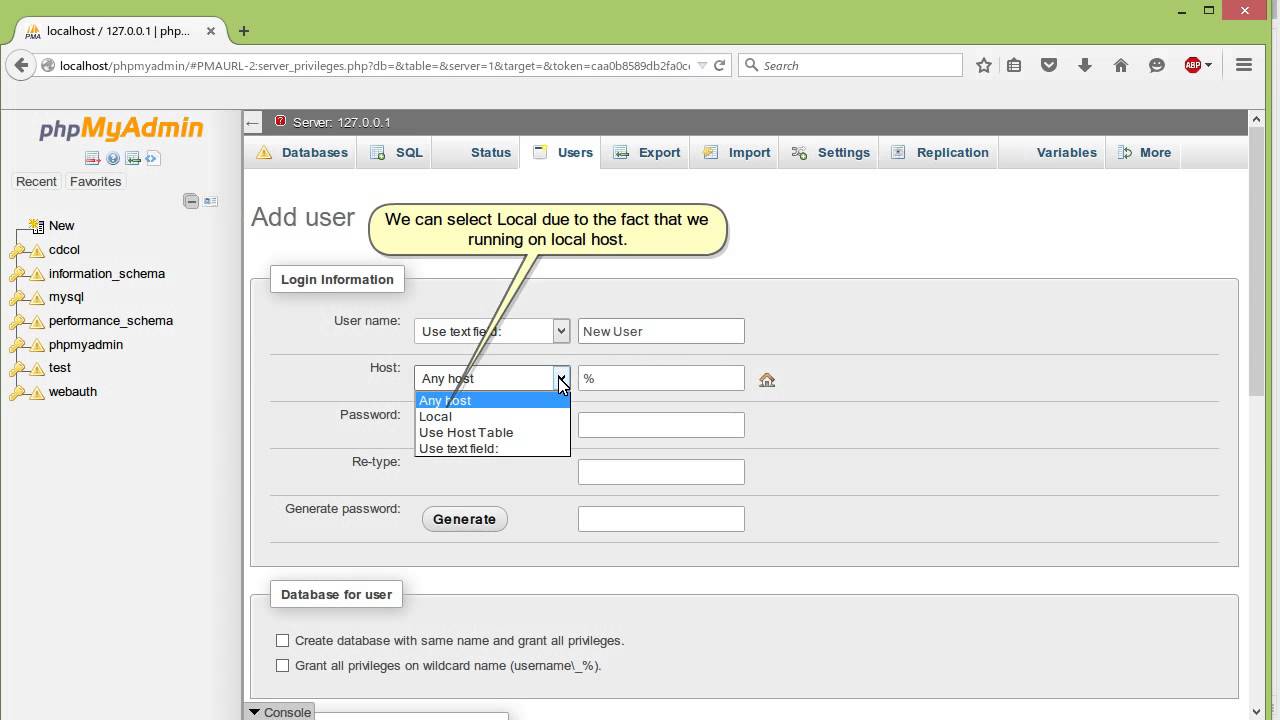
To add a new user, click on the “User accounts” tab at the top of the page. From there, you’ll see an option to add a new user. Click on this option and fill in the required fields, such as the username and password for the new user. You can also specify the host that the user will be connecting from.
Once you’ve filled in all the necessary information, click on the “Go” button to create the new user. You’ll now see the new user listed under the “User accounts” tab.
Step 3: Granting Permissions
Now that you’ve created a new user, the next step is to grant them the necessary permissions to access your database. To do this, click on the “Database” tab and select the database that you want to grant permissions for. You’ll then see a list of users who have access to the database.
Find the user that you just created and click on the “Edit privileges” option next to their name. From there, you can specify the privileges that you want to grant the user, such as select, insert, update, or delete. Once you’ve set the privileges, click on the “Go” button to save your changes.
Step 4: Testing the New User
Once you’ve created the new user and granted them the necessary permissions, it’s a good idea to test their access to the database. You can do this by logging out of phpMyAdmin and logging back in using the credentials of the new user. If you’re able to access the database and perform the actions that you’ve granted permissions for, then congratulations – you’ve successfully created a new user for your database!
Creating a new user in phpMyAdmin is a straightforward process that can be done in just a few simple steps. By following the steps outlined in this guide, you’ll be able to add new users to your database and manage their permissions with ease. Happy database managing!
