How to Install Windows Server on Proxmox
Proxmox is a powerful open-source platform that allows you to run virtual machines and containers on a single host. One of the most common use cases for Proxmox is running Windows Server on a virtual machine. In this guide, we will walk you through the steps to install Windows Server on Proxmox to get your server up and running in no time.
Step 1: Download the ISO
The first step in installing Windows Server on Proxmox is to download the ISO file from the official Microsoft website. You can choose between Windows Server Standard or Datacenter editions, depending on your requirements. Make sure to download the correct version that matches your Proxmox host’s CPU architecture.
Step 2: Create a New Virtual Machine
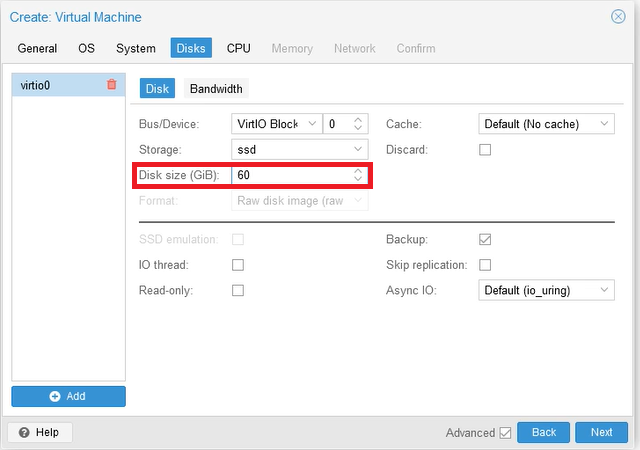
Once you have the ISO file ready, log in to your Proxmox web interface and create a new virtual machine. Select the correct operating system type (Windows) and version (Windows 10/2016 or later) during the virtual machine creation process. Make sure to allocate enough resources such as CPU cores, RAM, and storage space for your Windows Server VM.
Step 3: Install Windows Server
Start the virtual machine and mount the ISO file you downloaded in Step 1 as the virtual CD drive. Follow the on-screen instructions to install Windows Server on the virtual machine. Make sure to configure the networking settings and create an administrator account during the installation process.
Step 4: Install VirtIO Drivers
After the Windows Server installation is complete, you need to install VirtIO drivers for optimal performance. These drivers enable efficient communication between the virtual machine and Proxmox host. Download the VirtIO drivers from the Proxmox website and follow the installation instructions provided.
Step 5: Configure Remote Desktop Access
Once the VirtIO drivers are installed, configure remote desktop access to your Windows Server VM. You can use the built-in Remote Desktop feature in Windows or install a third-party remote desktop software for easier access. Make sure to secure your remote desktop connection with a strong password and consider setting up a firewall to restrict access.
Step 6: Update Windows Server
It is crucial to keep your Windows Server installation up to date with the latest security patches and updates. Use the Windows Update feature to download and install the necessary updates regularly. This will help protect your server from security vulnerabilities and ensure optimal performance.
Conclusion
Installing Windows Server on Proxmox is a straightforward process that allows you to leverage the power of virtualization for your server environment. By following the steps outlined in this guide, you can set up a Windows Server virtual machine on Proxmox quickly and efficiently. Remember to regularly update your server and secure your remote desktop access to keep your data safe.
