How to whitelist domains in Office 365
Office 365 is a powerful suite of tools that can help streamline your business operations. However, sometimes legitimate emails can get caught in the spam filter, causing important messages to go unnoticed. To prevent this from happening, you can whitelist domains in Office 365, allowing emails from specific senders to always come through. Here’s how you can do it:
1. Sign in to your Office 365 account
The first step in whitelisting domains in Office 365 is to sign in to your account. Once you’re logged in, navigate to the Exchange admin center.
2. Access the spam filter settings
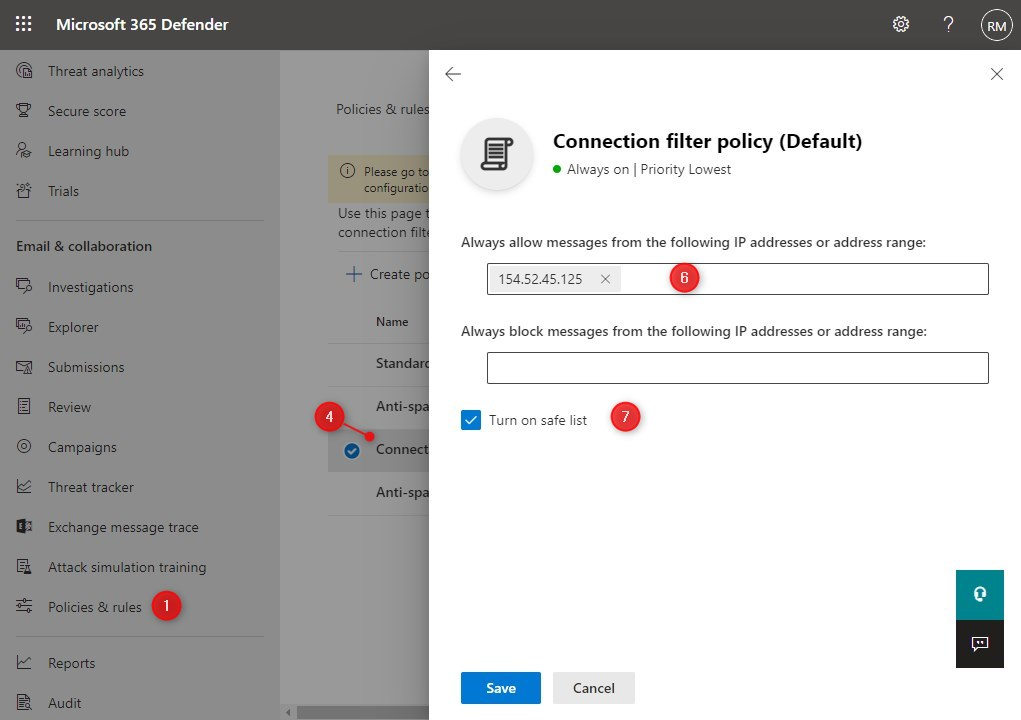
Once you’re in the Exchange admin center, click on the ‘protection’ tab and then select ‘spam filter’. This is where you can manage your spam settings and whitelist domains.
3. Whitelist the domain
To whitelist a domain, go to the ‘safelist’ section under the spam filter settings. Here, you can add the domains you want to whitelist by clicking on ‘add’ and entering the domain name.
4. Save your changes
Once you’ve added the domains you want to whitelist, don’t forget to save your changes. This ensures that emails from these domains will no longer be flagged as spam.
5. Test the whitelist
After you’ve whitelisted the domains, it’s a good idea to test the settings by sending yourself an email from the whitelisted domain. If the email comes through without any issues, then you’ve successfully whitelisted the domain.
Conclusion
Whitelisting domains in Office 365 can help ensure that important emails aren’t missed. By following the steps outlined above, you can easily whitelist domains and make sure that emails from trusted senders always reach your inbox.
