How to whitelist an email domain
Whitelisting an email domain is an essential step in ensuring that important emails from trusted sources do not end up in your spam folder. By whitelisting an email domain, you are telling your email provider that you trust the sender and want their emails to bypass the spam filter.
Here’s a simple guide on how to whitelist an email domain:
Gmail
If you are using Gmail, follow these steps to whitelist an email domain:
- Open Gmail and log in to your account.
- Click the gear icon in the top right corner and select “Settings” from the dropdown menu.
- Go to the “Filters and Blocked Addresses” tab.
- Click on “Create a new filter”.
- In the “From” field, enter the email domain you want to whitelist.
- Click “Create filter”.
- Check the box next to “Never send it to Spam”.
- Click “Create filter” to save your changes.
Outlook
For Outlook users, here’s how you can whitelist an email domain:
- Sign in to your Outlook account.
- Click on the “Settings” gear icon at the top right corner.
- Choose “View all Outlook settings”.
- Go to “Mail” > “Junk email”.
- Under the “Safe senders and domains” section, click “Add” and enter the email domain you want to whitelist.
- Click “Add” to save the changes.
Yahoo Mail
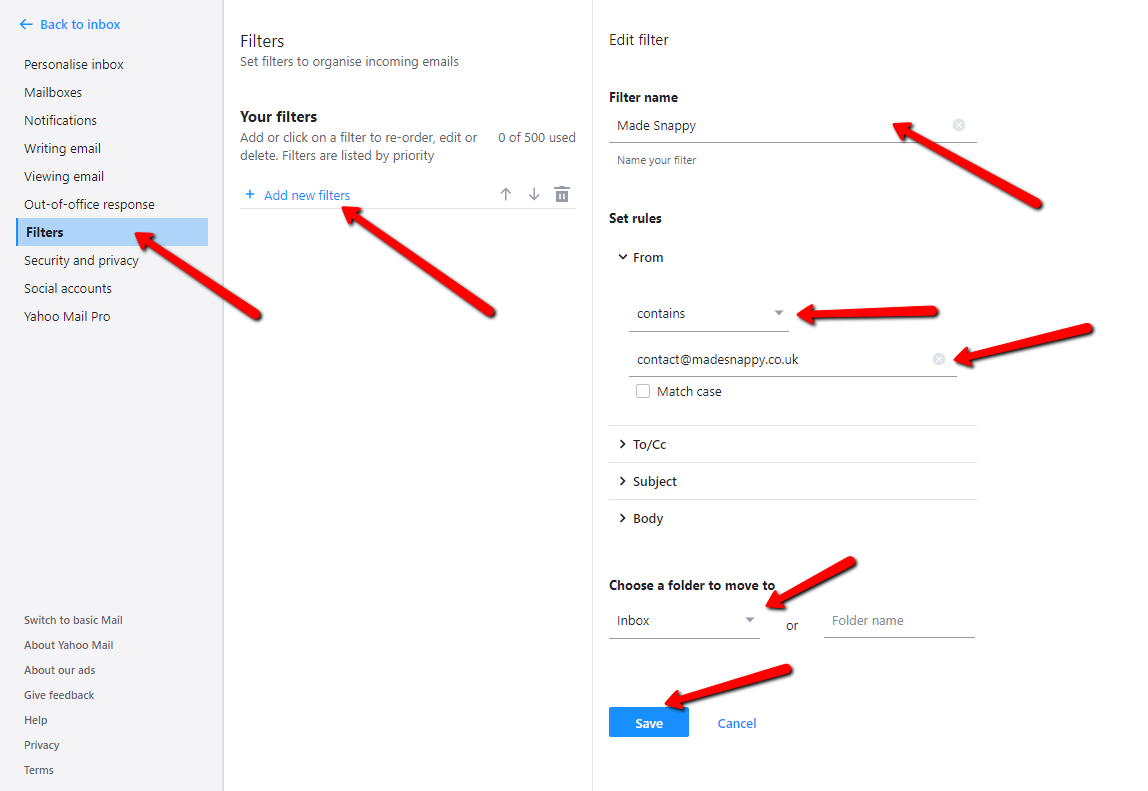
If you use Yahoo Mail, follow these steps to whitelist an email domain:
- Login to your Yahoo Mail account.
- Click on the gear icon and select “More Settings”.
- Go to “Filters” in the left menu.
- Click “Add” to create a new filter.
- Enter a name for the filter and in the “Sender” field, enter the email domain you want to whitelist.
- Choose the option to “Deliver the email to the folder” and select “Inbox”.
- Click “Save” to save the filter settings.
By following these steps, you can whitelist an email domain and ensure that important emails from trusted sources are always delivered to your inbox. Keep your inbox organized and don’t miss out on important messages!
