How to Take Database Backup in SQL Server 2008 R2 Step by Step
Creating regular backups of your SQL Server 2008 R2 databases is crucial to prevent data loss in case of system failures, disasters, or accidental deletion. In this article, we will guide you through the process of taking a database backup step by step.
Step 1: Launch SQL Server Management Studio
The first step is to launch SQL Server Management Studio (SSMS) on your computer. You can do this by searching for “SQL Server Management Studio” in the Windows Start menu and clicking on the application icon.
Step 2: Connect to the Database Server
Once SSMS is open, you need to connect to the database server where the database you want to backup is located. Enter the server name, authentication method, and credentials to establish a connection.
Step 3: Expand Databases
Expand the “Databases” node in the Object Explorer of SSMS to view a list of databases on the server. Locate and select the database you want to backup.
Step 4: Right-click on the Database
Right-click on the database you selected in the Object Explorer. A context menu will appear with various options. Click on “Tasks” and then select “Backup.”
Step 5: Configure Backup Options
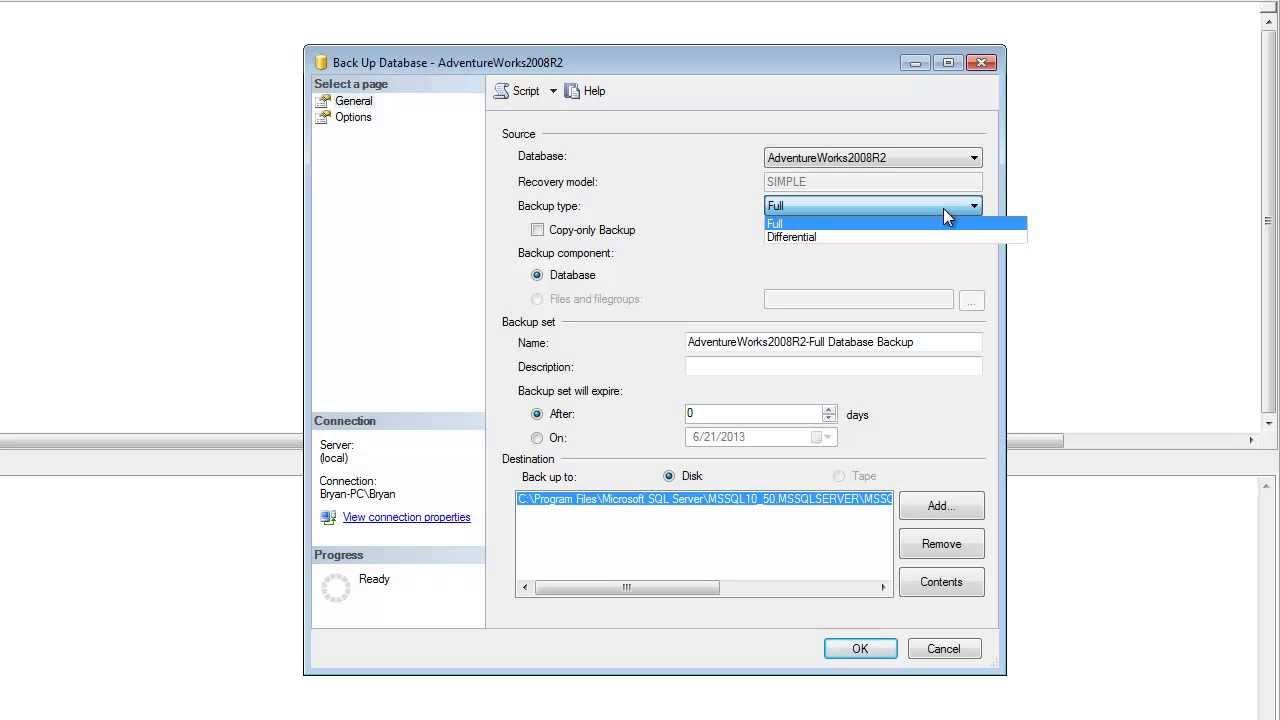
In the Backup Database window, you can configure various options such as the backup type (Full, Differential, or Transaction Log), destination for the backup file, and backup set name. Make sure to review and adjust the options according to your requirements.
Step 6: Schedule Backup (Optional)
If you want to schedule regular backups of the database, you can do so by clicking on the “Script” button in the Backup Database window. This will generate a T-SQL script that you can use to create a backup job in SQL Server Agent.
Step 7: Start the Backup Process
Once you have configured all the backup options, click on the “OK” button in the Backup Database window to start the backup process. SQL Server will create a backup of the selected database and store it in the specified destination.
Step 8: Verify the Backup
To ensure that the backup was successful, you can check the backup file in the specified destination folder. You can also verify the integrity of the backup file by restoring it to a test database.
By following these steps, you can easily take a database backup in SQL Server 2008 R2 and safeguard your valuable data from unforeseen disasters. Remember to regularly schedule backups and store them in secure locations to protect your data effectively.
