How to Take Backup from cPanel
In this article, we will guide you step by step on how to take a backup from cPanel. Taking regular backups of your website is crucial to avoid losing important data in case of emergencies or unexpected events. With cPanel, the process of creating backups is simple and straightforward. Follow the instructions below to ensure your website’s data is safe and secure.
Step 1: Log in to cPanel
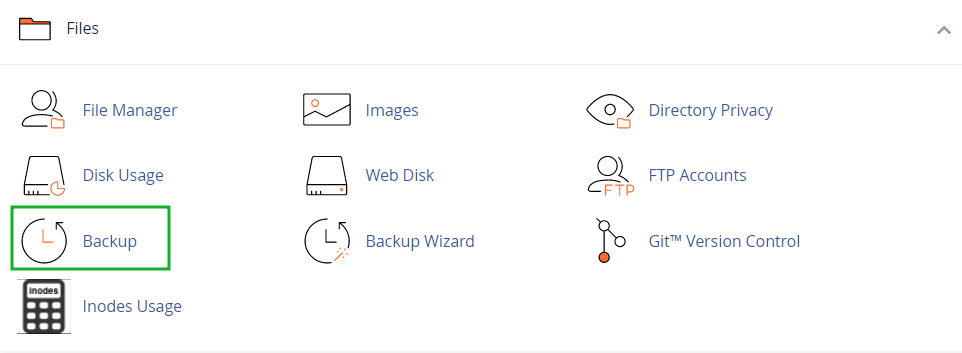
First, log in to your cPanel account using your username and password. Once logged in, navigate to the “Files” section where you will find various options for managing your website’s files and data.
Step 2: Backup Wizard
Click on the “Backup Wizard” icon in the Files section of cPanel. This tool will guide you through the process of creating a full or partial backup of your website.
Step 3: Select Backup Type
Choose whether you want to create a full backup or a partial backup of your website. A full backup includes all files, databases, emails, and settings, while a partial backup allows you to select specific files or databases to back up.
Step 4: Download Backup
Once you have selected the backup type, click on the “Download” button to start the backup process. Depending on the size of your website, this may take some time to complete. Once the backup is ready, you will be able to download a compressed file containing all your website’s data.
Step 5: Store Backup Securely
After downloading the backup file, make sure to store it securely in a safe location. It is recommended to store backups on an external drive or cloud storage service to ensure they are not lost in case of hardware failure or data corruption.
Conclusion
Regularly backing up your website is essential to prevent data loss and ensure the continuity of your online presence. By following the steps outlined above, you can easily create backups of your website’s data using cPanel. Remember to schedule regular backups to keep your data safe and secure at all times.
