How to Setup Website on Synology NAS
If you’re looking to host your own website from home, using a Synology NAS can be a great solution. With its versatility and easy setup process, you can have your website up and running in no time. In this guide, we will walk you through the steps to set up a website on your Synology NAS.
Step 1: Install Web Station
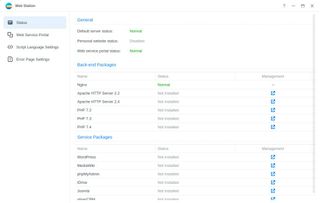
The first step is to install Web Station on your Synology NAS. Web Station is a built-in web server application that enables you to create a website or host a web application. To install Web Station, go to Package Center, search for Web Station, and click Install. Once the installation is complete, open Web Station from the main menu.
Step 2: Enable PHP and MySQL
To run a website, you will need PHP and MySQL support. In Web Station, go to PHP Settings and enable PHP by checking the box next to PHP 7.4. Next, go to MariaDB and enable the MySQL server by clicking on the Enable button. Make sure to note down the database username and password for later use.
Step 3: Create a Website Folder
Next, you’ll need to create a folder to store your website files. In File Station, create a new folder under the web folder. This is where you will upload your website files. Make sure to set the appropriate permissions for the folder to ensure that your website can be accessed.
Step 4: Upload Website Files
Now that you have a folder set up, you can start uploading your website files. You can either use File Station to upload files individually or use an FTP client to upload multiple files at once. Make sure to upload your HTML, CSS, JavaScript, and image files into the website folder.
Step 5: Create a Database
To store dynamic content, such as user data or blog posts, you will need to create a database. In MariaDB, go to phpMyAdmin and create a new database. Create a new user with privileges to access the database and note down the database name, username, and password.
Step 6: Configure Website Settings
Finally, you will need to configure your website settings. In Web Station, go to Virtual Host and click Create. Enter the domain name for your website and select the folder where your website files are stored. Next, enter the database information you noted down earlier. Click Apply to save your settings.
Step 7: Access Your Website
Once you have completed the setup process, you can access your website by entering the domain name you configured in your web browser. You should see your website up and running, ready for visitors to explore. Congratulations, you have successfully set up a website on your Synology NAS!
Hosting your website on a Synology NAS is a convenient and cost-effective solution for those looking to have more control over their web hosting. With these easy-to-follow steps, you can create and manage your website with ease. Have fun building your online presence!
