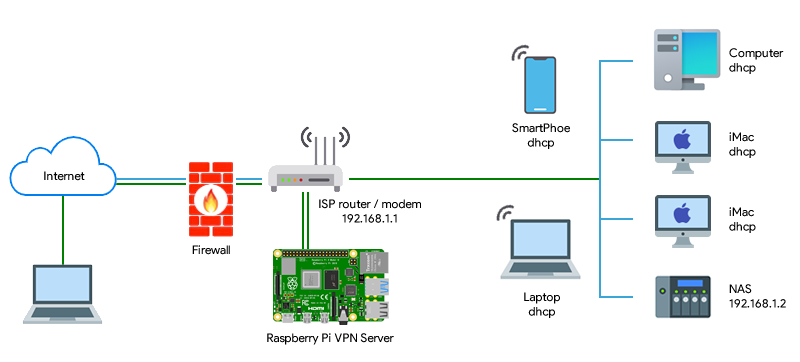
How to Setup OpenVPN Server on Raspberry Pi 4
Setting up an OpenVPN server on your Raspberry Pi 4 can provide you with a secure and encrypted connection to access your network remotely. In this tutorial, we will guide you through the process of configuring your Raspberry Pi 4 as an OpenVPN server.
Step 1: Update Raspberry Pi 4
Before we begin, ensure your Raspberry Pi 4 is up to date. Open a terminal window and run the following commands:
sudo apt update
sudo apt upgrade
Step 2: Install OpenVPN
Next, install OpenVPN by running the following command:
sudo apt install openvpn
Step 3: Configure OpenVPN
After installation, navigate to the OpenVPN configuration directory:
cd /etc/openvpn
Copy the sample configuration files to the OpenVPN directory:
sudo cp -r /usr/share/doc/openvpn/examples/easy-rsa/3.0/* .
Edit the configuration file to customize your server settings:
sudo nano /etc/openvpn/server.conf
Step 4: Generate Keys
Generate the Diffie-Hellman key used for encryption:
sudo openssl dhparam -out /etc/openvpn/dh2048.pem 2048
Generate keys and certificates for the server and clients:
cd /etc/openvpn/easy-rsa/3.0 && ./easyrsa init-pki && ./easyrsa build-ca && ./easyrsa gen-dh && ./easyrsa build-server-full server nopass && ./easyrsa build-client-full client1 nopass && cp pki/ca.crt pki/private/server.key pki/issued/server.crt /etc/openvpn
Step 5: Start OpenVPN Service
Enable and start the OpenVPN service:
sudo systemctl enable openvpn-server@server && sudo systemctl start openvpn-server@server
Step 6: Configure Port Forwarding
Set up port forwarding on your router to allow OpenVPN traffic to pass through:
Finally, download the OpenVPN configuration files to your client devices and connect to your Raspberry Pi 4 OpenVPN server using the generated client keys and certificates.
Congratulations! You have successfully set up an OpenVPN server on your Raspberry Pi 4. Enjoy secure and encrypted remote access to your network.
