How to Setup NFS: A Step-by-Step Guide
Network File System (NFS) is a distributed file system protocol that allows for easy file sharing between systems over a network. Setting up NFS can be a powerful tool in your networking arsenal, making it easier to access and share files across multiple devices. In this guide, we’ll walk you through the steps to set up NFS on your system.
Step 1: Install NFS Server
The first step in setting up NFS is to install the NFS server software on the system that will be sharing files. On most Linux distributions, such as Ubuntu or CentOS, you can install the NFS server using the following command:
sudo apt install nfs-kernel-server
Once the installation is complete, you can move on to configuring the NFS server.
Step 2: Configure NFS Exports
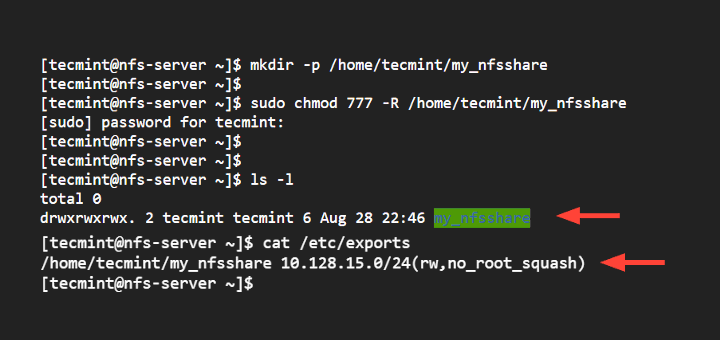
Now that the NFS server is installed, you’ll need to configure which directories you want to share over the network. This is done by editing the exports file. The exports file is located at /etc/exports. You can use your favorite text editor to open the file and add the directories you want to share. For example, to share the directory /home/user/shared, you can add the following line to the exports file:
/home/user/shared *(rw,sync,no_subtree_check)
Once you’ve added the directories you want to share, save the file and run the following command to apply the changes:
sudo exportfs -a
Step 3: Start NFS Server
With the NFS server configured, you can now start the NFS server service to begin sharing files. You can start the NFS server service using the following command:
sudo systemctl start nfs-server
If you want the NFS server service to start automatically on system boot, you can enable it using the following command:
sudo systemctl enable nfs-server
Step 4: Connect NFS Clients
Now that the NFS server is up and running, you can connect NFS clients to access the shared directories. On the client system, you can mount the shared directory using the following command:
sudo mount nfs_server:/shared_directory /mount_point
Replace nfs_server with the IP address or hostname of the NFS server, shared_directory with the directory you want to access, and mount_point with the local directory where you want to mount the shared directory.
Once the command is executed, you should be able to access the shared directory on the client system.
Step 5: Verify NFS Setup
To verify that NFS is set up properly and working correctly, you can use the showmount command on the NFS server:
showmount -e localhost
This command will display a list of directories that are currently exported and available for NFS clients to access. If the directory you added earlier is listed, then NFS is set up correctly.
Conclusion
Setting up NFS can be a powerful tool for file sharing and collaboration across a network. By following the steps outlined in this guide, you can easily set up NFS on your system and start sharing files with ease. Remember to always secure your NFS setup by configuring proper permissions and firewalls to protect your data.
