How to Setup Email Alias
Email aliases are a clever way to manage your emails more efficiently. They allow you to create multiple email addresses that all funnel into one main inbox. This can be useful for organizational purposes, separating work and personal emails, or creating distinct email addresses for different purposes. In this article, we will guide you through setting up email aliases and how you can benefit from using them.
1. Choose Your Email Provider
The first step in setting up an email alias is to choose your email provider. Some popular options include Gmail, Outlook, Yahoo, and more. Different providers may have varying procedures for setting up aliases, so it’s essential to research and understand the process specific to your chosen provider.
2. Access Your Email Settings
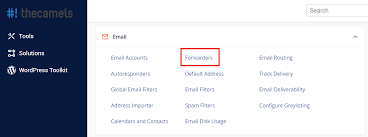
Once you have selected your email provider, the next step is to access your email settings. Look for an option that allows you to manage aliases or alternative email addresses. This setting is usually found in the account settings or preferences section of your email provider’s website.
3. Create Your Alias
Now that you have found the alias management section, you can create your email alias. Choose a unique alias that reflects the purpose of the email address. For example, if you are setting up a work-related alias, you could use ‘work@yourdomain.com’ as your alias. Follow the on-screen instructions to complete the creation process.
4. Verify Your Alias
After creating your alias, you may need to verify it to ensure that it is active and functioning correctly. This verification process typically involves sending a confirmation email to the alias and clicking on a link or entering a code to confirm its validity. Once verified, your alias should be ready to use.
5. Start Using Your Alias
Now that your email alias is set up and verified, you can start using it to send and receive emails. Remember that emails sent to your alias will land in the main inbox associated with your email account. You can also reply to emails using your alias, making it seamless to manage multiple email addresses from one account.
Benefits of Using Email Aliases
- Organize your emails more efficiently
- Separate work and personal emails
- Create distinct email addresses for different purposes
- Manage multiple email addresses from one inbox
Setting up email aliases can streamline your email management process and make it easier for you to stay organized. By following the steps outlined in this article, you can create and use email aliases effectively to suit your specific needs.
Whether you’re a freelancer, small business owner, or individual looking to simplify your email workflow, email aliases can be a valuable tool in your arsenal. Take the time to set up aliases that cater to your unique requirements and enjoy the benefits of a more organized and efficient email experience.
