How to Set Up an Email Alias
Setting up an email alias can be a great way to manage multiple email addresses more efficiently. Whether you want to create a professional email alias for your business or simply keep your personal and work emails separate, having an email alias can streamline your communication process. Follow these simple steps to set up an email alias and start using it today!
Step 1: Choose an Email Provider
The first step in setting up an email alias is to choose an email provider that supports alias creation. Many popular email services such as Gmail, Outlook, and Yahoo Mail allow users to set up aliases. Make sure to select a provider that meets your needs and preferences.
Step 2: Access Email Settings
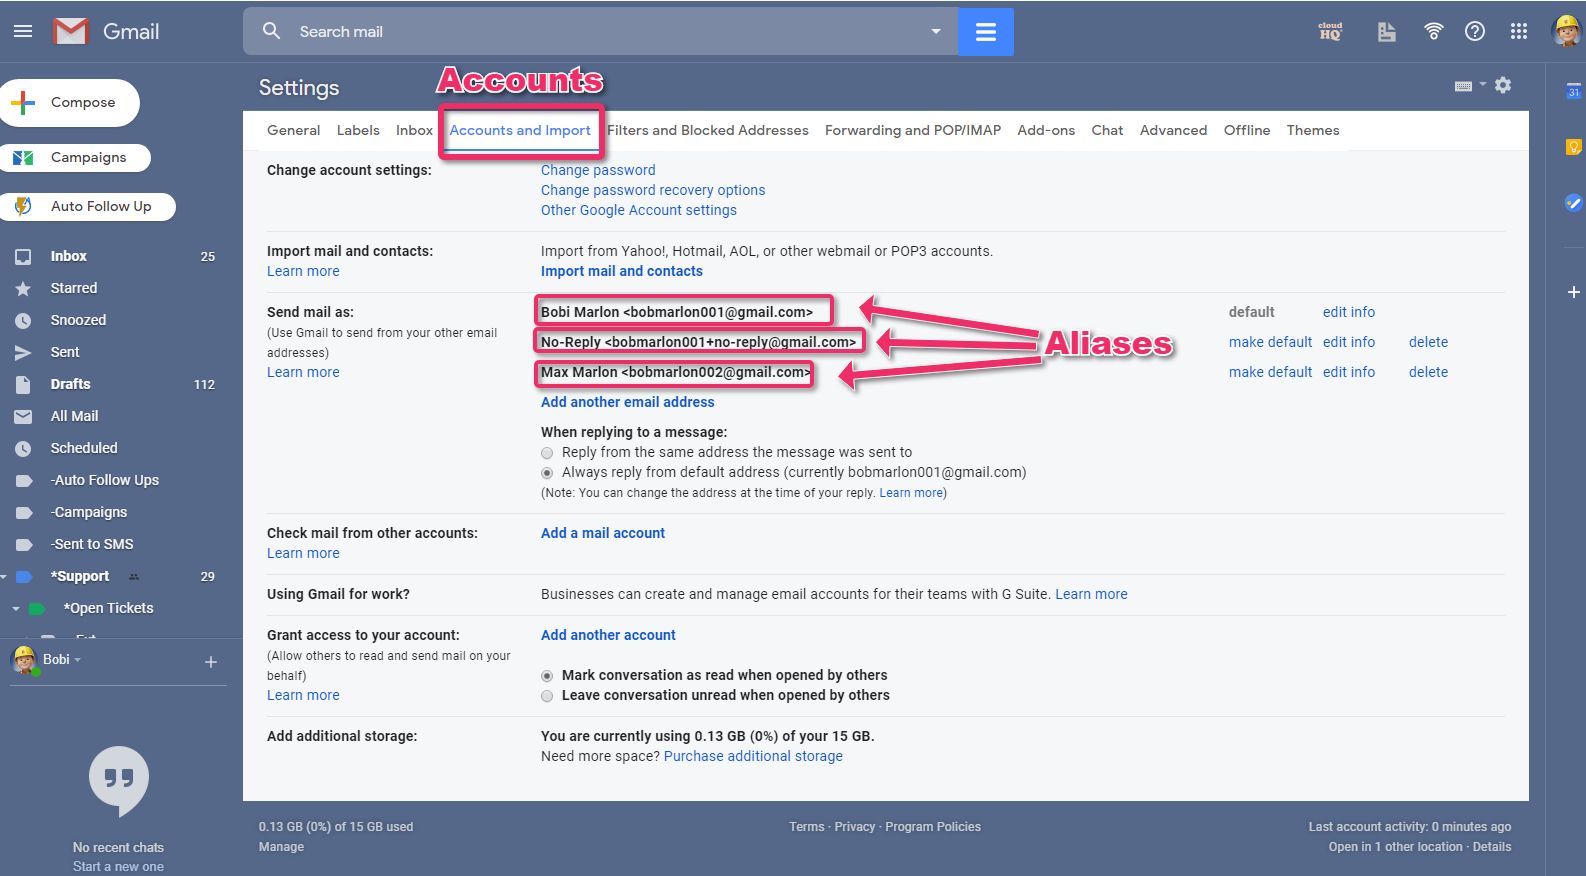
Once you have chosen an email provider, log in to your email account and navigate to the settings or account preferences section. Look for an option related to email aliases or alternate email addresses.
Step 3: Create an Alias
Follow the prompts provided by your email provider to create a new email alias. You may be asked to enter the alias address, choose a display name, and set up forwarding options if desired. Make sure to verify the alias through any confirmation emails sent by the provider.
Step 4: Use Your Alias
Once your email alias is set up, you can start using it to send and receive emails. When composing a new message, simply select your alias from the sender dropdown menu. Incoming emails sent to your alias will be delivered to your primary inbox, allowing you to manage all your emails in one place.
Step 5: Manage Your Aliases
Depending on your email provider, you may have the option to create multiple aliases for different purposes. You can easily manage and edit your aliases in the email settings section. Consider creating separate aliases for work, personal, and subscriptions to stay organized.
Step 6: Secure Your Aliases
It’s important to protect your email aliases from misuse or spam. Avoid sharing your aliases publicly and be cautious when providing them to unknown sources. Regularly monitor your aliases for any suspicious activity and update your security settings as needed.
Step 7: Enjoy the Benefits
By setting up email aliases, you can enjoy greater flexibility and control over your email communications. Whether you want to create a professional persona, manage different aspects of your life, or simply keep your inbox organized, email aliases can help you achieve your goals. Start using your aliases today and streamline your email experience!
