How to Set Up a DNS Record
Setting up a DNS record may sound like a complex task, but with a little knowledge and guidance, it can be quite simple. DNS, which stands for Domain Name System, is a crucial component of the internet that translates domain names into IP addresses. In this article, we will walk you through the steps to set up a DNS record, whether you are a beginner or have some experience in managing domain settings.
Step 1: Access Your Domain Registrar
The first step in setting up a DNS record is to access your domain registrar’s website. This is where you purchased your domain name from. Log in to your account using the credentials provided to you during the registration process. Once logged in, look for the option to manage your domain or DNS settings.
Step 2: Locate DNS Settings
After accessing your domain registrar’s website and logging in, you will need to locate the DNS settings for your domain. This is where you can add, edit, or delete DNS records. The location of these settings may vary depending on your registrar, but they are commonly found under the domain management or advanced settings section.
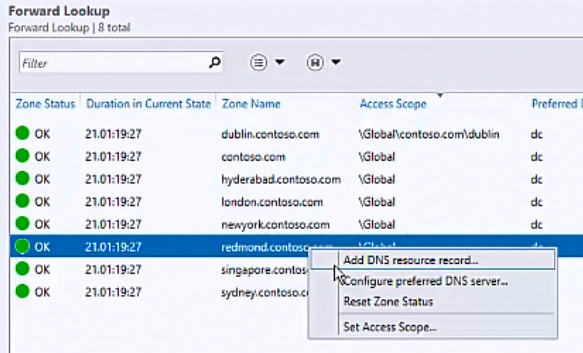
Step 3: Add a DNS Record
Once you have located the DNS settings for your domain, you can proceed to add a new DNS record. There are several types of DNS records, each serving a different purpose. The most common types include:
- A Record: Maps a domain name to an IP address
- CNAME Record: Maps a domain name to another domain name
- MX Record: Specifies mail servers for the domain
- TXT Record: Stores text information related to the domain
Depending on your specific needs, you will choose the appropriate type of DNS record to add. Each type requires different information to be filled out, such as the host name, value, and TTL (Time To Live). Refer to your DNS provider’s documentation for guidance on what information is required for each type of DNS record.
Step 4: Save Changes
After adding the necessary information for your new DNS record, make sure to save your changes. This may involve clicking a “Save” or “Update” button, depending on your registrar’s interface. Once saved, your new DNS record will now be active and will start propagating across the internet. Keep in mind that DNS changes may take some time to fully take effect, so be patient.
Step 5: Test Your DNS Record
Once you have set up your DNS record, it is essential to test it to ensure that it is functioning correctly. There are various online tools available that can help you perform DNS lookups and verify that your DNS record is resolving correctly. Make sure to double-check all the information you entered to avoid any potential issues with your DNS settings.
Conclusion
Setting up a DNS record may seem daunting at first, but with the right guidance, it can be a straightforward process. By following the steps outlined in this article and consulting your DNS provider’s documentation, you can successfully add, edit, and manage DNS records for your domain. Remember to test your DNS settings regularly and make any necessary updates to ensure optimal performance.
