How to Create a New Database in phpMyAdmin
Setting up a new database in phpMyAdmin is a simple and straightforward process that can be completed in just a few steps. This guide will walk you through the steps required to create a new database in phpMyAdmin.
Step 1: Log into phpMyAdmin
The first step in creating a new database in phpMyAdmin is to log into the phpMyAdmin dashboard. You can do this by entering the URL for your phpMyAdmin installation in your web browser and logging in with your username and password.
Step 2: Click on Databases Tab
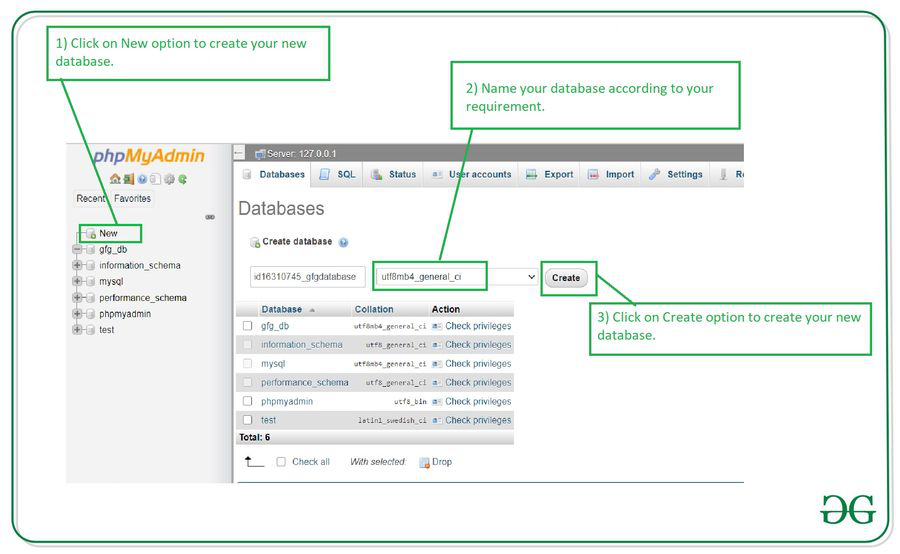
Once you have logged in to phpMyAdmin, you will see a list of databases on the left-hand side of the screen. Click on the “Databases” tab to proceed to the next step.
Step 3: Enter Database Name
After clicking on the “Databases” tab, you will be taken to a page where you can see a list of existing databases and an option to create a new one. Enter the name of your new database in the “Create database” field and click the “Create” button.
Step 4: Configure Database Settings
Once you have created your new database, you can configure its settings by clicking on the “Check All” link next to the database name. From here, you can set the collation, change the database engine, and more.
Step 5: Add Tables and Data
With your new database created and configured, you can now start adding tables and data to it. Click on the newly created database in the left-hand column and then click on the “SQL” tab to start running SQL queries to create tables and insert data.
Step 6: Test Your Database
Before using your new database in your web applications, it’s essential to test it to ensure everything is working correctly. You can do this by running test queries, checking for errors, and making any necessary adjustments.
Conclusion
Creating a new database in phpMyAdmin is a straightforward process that can be completed in just a few steps. By following the steps outlined in this guide, you can create, configure, and start using your new database in no time.