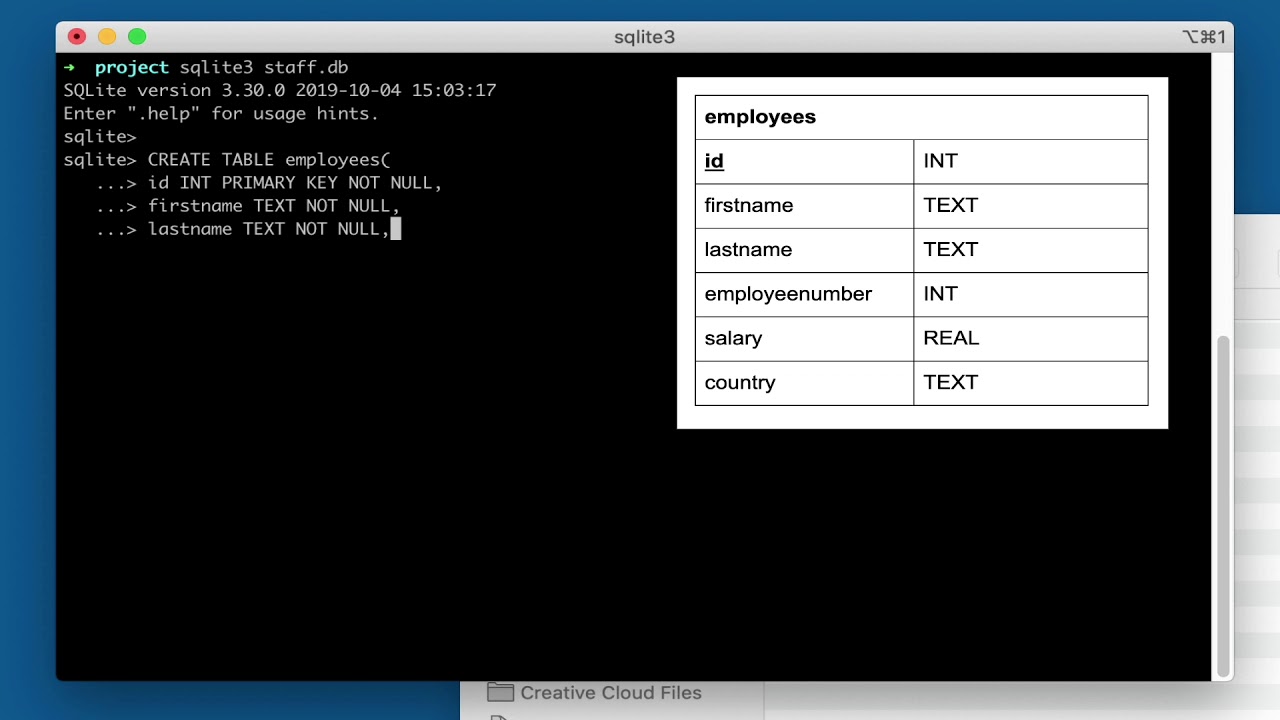
How to Create Tables in SQLite
SQLite is a popular relational database management system that is widely used in various applications. Creating tables in SQLite is one of the most fundamental tasks when working with databases. In this article, we will guide you on how to create tables in SQLite step by step.
Step 1: Open SQLite Command Line
The first step in creating tables in SQLite is to open the SQLite command line. You can do this by opening your command prompt or terminal and typing “sqlite3” to launch the SQLite shell.
If you do not have SQLite installed on your system, you can download it from the SQLite website and follow the installation instructions to set it up.
Step 2: Connect to a Database
Once you have opened the SQLite command line, the next step is to connect to a database. You can do this by typing “.open database_name.db” where “database_name.db” is the name of the database you want to connect to.
If the database does not exist, SQLite will create a new database with the specified name.
Step 3: Create a Table
Now that you are connected to a database, you can create a new table using the CREATE TABLE statement. The syntax for creating a table in SQLite is as follows:
CREATE TABLE table_name (
    column1 datatype PRIMARY KEY,
    column2 datatype,
    column3 datatype,
    ...
);
Replace “table_name” with the name you want to give to your table, “column1”, “column2”, etc. with the names of the columns in your table, and “datatype” with the data type of the columns.
The PRIMARY KEY constraint is used to uniquely identify each record in the table. It must contain unique values and cannot be NULL.
Once you have defined the structure of your table, you can execute the CREATE TABLE statement to create the table in the database.
Step 4: View the Table Structure
To view the structure of the table you have created, you can use the .schema command in the SQLite command line. This will display the SQL code that was used to create the table along with its structure.
Step 5: Insert Data into the Table
After creating a table, you can start inserting data into it using the INSERT INTO statement. The syntax for inserting data into a table is as follows:
INSERT INTO table_name (column1, column2, column3, ...) VALUES (value1, value2, value3, ...);
Replace “table_name” with the name of the table you want to insert data into, “column1”, “column2”, etc. with the names of the columns in the table, and “value1”, “value2”, etc. with the values you want to insert into the table.
Once you have inserted the data, you can use the SELECT statement to retrieve and view the data in the table.
Conclusion
Creating tables in SQLite is an essential skill for anyone working with databases. By following the steps outlined in this article, you can easily create tables in SQLite and start storing and manipulating data efficiently. Have fun exploring the world of SQLite databases!
