How to create NFS Server
Welcome to our guide on how to create an NFS server. NFS, or Network File System, is a distributed file system protocol that allows users to access files over a network much like local storage. Setting up an NFS server can be incredibly useful for sharing files between multiple systems in a network, making it a popular choice for medium to large businesses.
Step 1: Install NFS Server Package
The first step in creating an NFS server is to install the necessary package on your server. For Ubuntu, you can do this by running the following command in your terminal:
sudo apt-get update
sudo apt-get install nfs-kernel-server
For Red Hat-based systems, you can install the NFS server package by running:
sudo yum install nfs-utils
Step 2: Set Up Your Export Directory
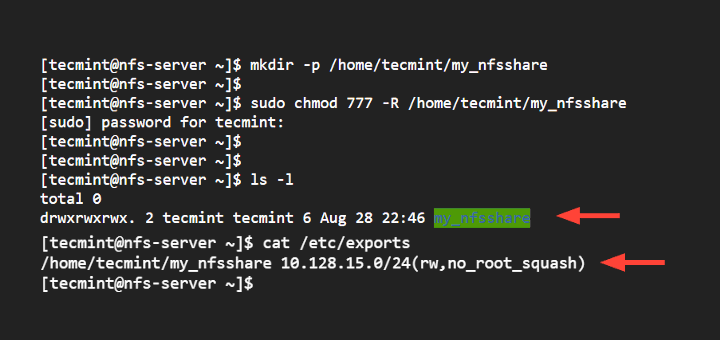
Next, you’ll need to set up the directory that you want to share over the network. This is known as the “export” directory. You can choose any directory on your system to be the export directory, but for this example, let’s use /srv/nfs.
sudo mkdir -p /srv/nfs
sudo chown nobody:nogroup /srv/nfs
sudo chmod 777 /srv/nfs
After creating the export directory, you’ll need to configure the NFS server to allow access to this directory. To do this, you’ll need to edit the /etc/exports file and add the following line:
/srv/nfs *(rw,sync,no_subtree_check)
Save the file and run the following command to apply the changes:
sudo exportfs -a
Step 3: Start the NFS Server
With everything set up, it’s time to start the NFS server. You can do this by running the following command:
sudo systemctl start nfs-server
If you want the NFS server to start automatically when the system boots up, run the following command:
sudo systemctl enable nfs-server
Step 4: Allow NFS Through the Firewall
If you have a firewall enabled on your system, you’ll need to allow NFS traffic through. For Ubuntu, you can do this by running:
sudo ufw allow from any to any port nfs
For Red Hat-based systems, you can use the following commands:
sudo firewall-cmd --permanent --zone=public --add-service=nfs
sudo firewall-cmd --reload
Step 5: Test Your NFS Server
Finally, it’s time to test your NFS server to ensure everything is set up correctly. You can do this by mounting the NFS share on a client machine. For example, if you’re using a Linux client, you can run the following command:
sudo mount SERVER_IP:/srv/nfs /mnt
If the mount is successful, you should be able to access the shared directory on the client machine. Congratulations, you’ve successfully created an NFS server!
We hope this guide has been helpful in setting up your own NFS server. If you encounter any issues or have any questions, feel free to reach out to our support team for assistance. Happy file sharing!
