How to Create a Database in phpMyAdmin
Creating a database in phpMyAdmin is essential for managing your website’s data efficiently. Whether you’re a beginner or an experienced developer, this step-by-step guide will help you set up a new database with ease.
Step 1: Accessing phpMyAdmin
First, you need to log in to your hosting account’s control panel. Locate the phpMyAdmin icon or link, usually found in the database or MySQL section. Click on it to open the phpMyAdmin interface.
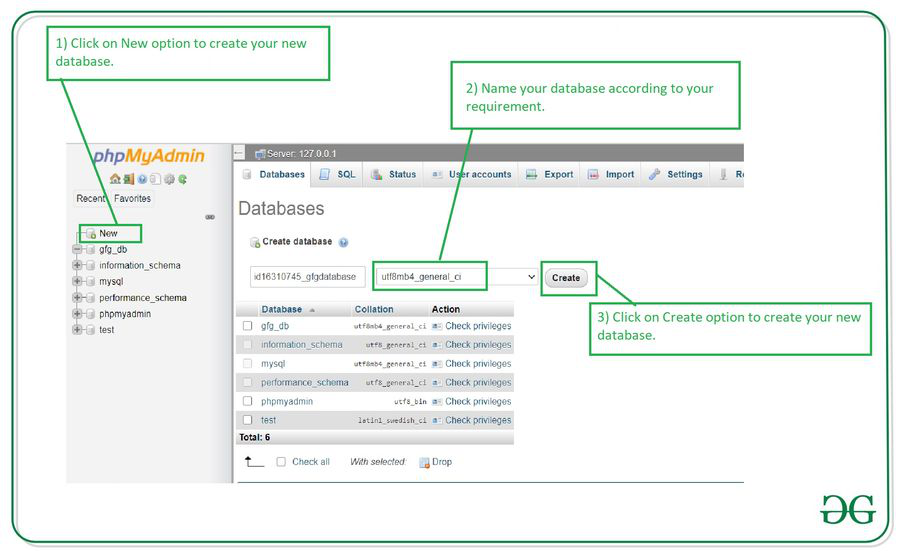
Step 2: Creating a New Database
Once you’re in phpMyAdmin, look for the “Databases” tab at the top of the page. Click on it, and you’ll see an option to create a new database. Enter a name for your database in the provided field and click “Create.”
Step 3: Setting Up Tables
After creating the database, you can now set up tables to organize your data. Click on the newly created database on the left sidebar and select the “Structure” tab. Here, you can add tables by defining their fields and properties.
Step 4: Importing Data
If you have existing data that you want to import into your new database, phpMyAdmin allows you to do so easily. Click on the “Import” tab, choose the file containing your data, and follow the on-screen instructions to complete the import process.
Step 5: Managing Your Database
Once your database is set up, you can manage it efficiently in phpMyAdmin. You can run SQL queries, create backups, optimize tables, and perform other maintenance tasks to ensure its smooth operation.
Conclusion
Creating a database in phpMyAdmin is a fundamental task for website owners and developers. By following these simple steps, you can successfully set up a new database and manage your data effectively. Remember to regularly maintain your database to keep it running smoothly.