How to Create a Table in pgAdmin
Creating a table in pgAdmin is crucial for organizing data effectively in your PostgreSQL database. Whether you are a beginner or an experienced user, this guide will walk you through the steps of creating a table in pgAdmin with ease.
Step 1: Open pgAdmin
First, make sure you have pgAdmin installed on your computer. Open pgAdmin and connect to your PostgreSQL server by entering your credentials.
Step 2: Navigate to your Database
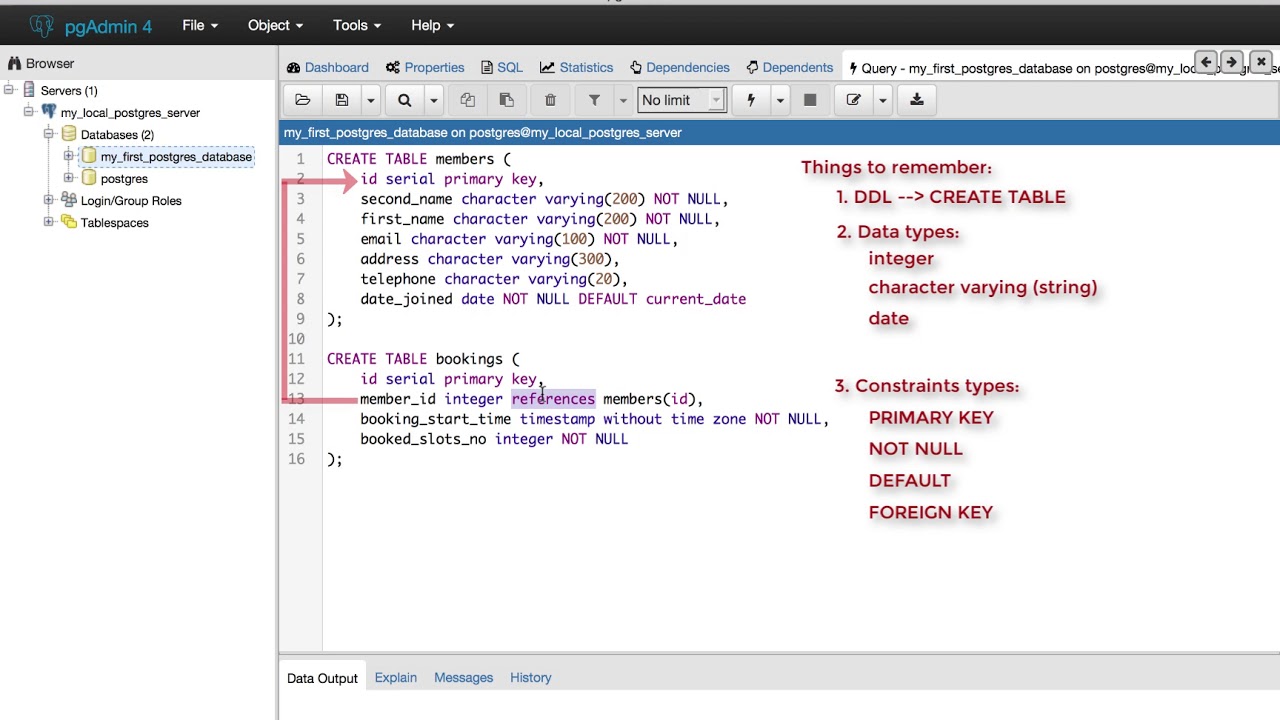
Once you’re connected to your server, navigate to the database where you want to create a table. Right-click on the database name and select ‘Query Tool’ to open a new SQL query window.
Step 3: Write the SQL Query
In the SQL query window, you can start writing your SQL query to create a new table. The basic syntax for creating a table is:
CREATE TABLE table_name (
  column1 datatype,
  column2 datatype,
  ...
);
Replace table_name, column1, column2, and datatype with your desired table name, column names, and data types. For example:
CREATE TABLE employees (
  employee_id serial PRIMARY KEY,
  first_name VARCHAR NOT NULL,
  last_name VARCHAR NOT NULL,
  email VARCHAR NOT NULL UNIQUE
);
Step 4: Execute the Query
After you’ve written your SQL query, click the ‘Execute’ button to create the table in your database. You should see a confirmation message indicating that the table has been created successfully.
Step 5: Verify the Table
To verify that the table has been created, expand the Tables folder under your database in pgAdmin. You should see your newly created table listed there.
Conclusion
Creating a table in pgAdmin is a straightforward process that involves writing a SQL query to define the table structure and executing it to create the table in your PostgreSQL database. By following the steps outlined in this guide, you can easily create tables in pgAdmin to organize your data efficiently.
