How to Configure Zimbra in Outlook
Configuring Zimbra in Outlook can be a useful integration for those who use both services regularly. By setting up Zimbra in Outlook, you can access your Zimbra emails, contacts, and calendar directly through the Outlook interface. This integration can streamline your workflow and make it easier to manage your email accounts.
Here is a step-by-step guide on how to configure Zimbra in Outlook:
Step 1: Gather Information
Before you begin the configuration process, you will need to gather some information about your Zimbra account. This includes your email address, password, and the server settings for your Zimbra account. You can usually find this information in the Zimbra web client under the account settings.
Step 2: Open Outlook
Open the Outlook application on your computer. If you do not have Outlook installed, you will need to download and install it before proceeding with the configuration.
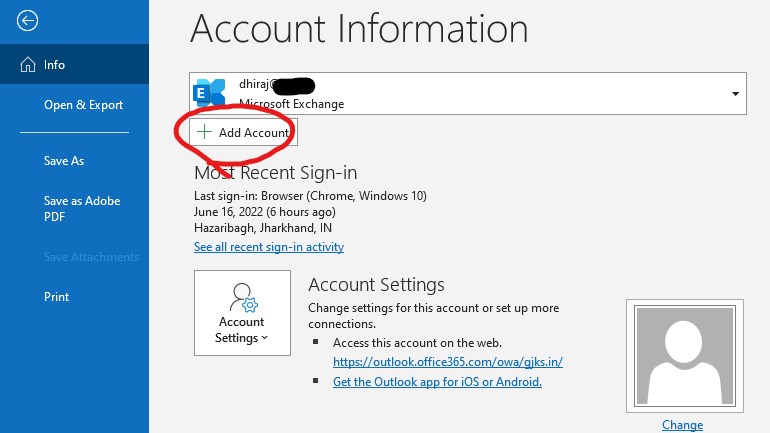
Step 3: Add Account
Go to the “File” menu in Outlook and click on “Add Account.” Select “Manual setup or additional server types” and click “Next.”
Step 4: Choose Email Service
Choose “POP or IMAP” as the email service and click “Next.”
Step 5: Enter Account Information
Enter your name, email address, account type (IMAP), incoming mail server (usually “mail.yourdomain.com”), and outgoing mail server (usually “mail.yourdomain.com”).
Step 6: Configure Server Settings
Click on the “More Settings” button and go to the “Outgoing Server” tab. Check the box that says “My outgoing server (SMTP) requires authentication” and select the option to use the same settings as your incoming mail server.
Step 7: Configure Advanced Settings
Go to the “Advanced” tab and enter the server settings for your Zimbra account. The incoming server (IMAP) should be set to port 993 and the outgoing server (SMTP) should be set to port 465. Select the option to use SSL/TLS encryption for both servers.
Step 8: Complete Setup
Click “Next” to test your account settings. If everything is configured correctly, you should see a success message. Click “Finish” to complete the setup process.
Once you have completed these steps, your Zimbra account should now be configured in Outlook. You can access your Zimbra emails, contacts, and calendar directly through the Outlook interface, making it easier to manage your email accounts and streamline your workflow.
Now that you have successfully configured Zimbra in Outlook, you can enjoy the benefits of having all your email accounts in one convenient location. This integration can help you stay organized and efficient in managing your emails and tasks.
By following these simple steps, you can set up Zimbra in Outlook quickly and easily. Enjoy the convenience of accessing your Zimbra emails directly through the Outlook interface and simplify your email management process today!
