How to Backup Database in SQL Server Script
Backing up your database is a crucial task in ensuring the security and integrity of your data. Whether you are a seasoned SQL Server user or just getting started, knowing how to properly backup your database is essential. In this article, we will walk you through a step-by-step guide on how to backup a database in SQL Server using a script.
Step 1: Connect to SQL Server Management Studio
The first step in backing up your database is to connect to your SQL Server Management Studio. Open the program and connect to the server where your database is located. Make sure you have the necessary permissions to perform a backup operation.
Step 2: Open a New Query
Once you have connected to the server, open a new query window. You can do this by clicking on the “New Query” button in the toolbar or by pressing Ctrl+N on your keyboard.
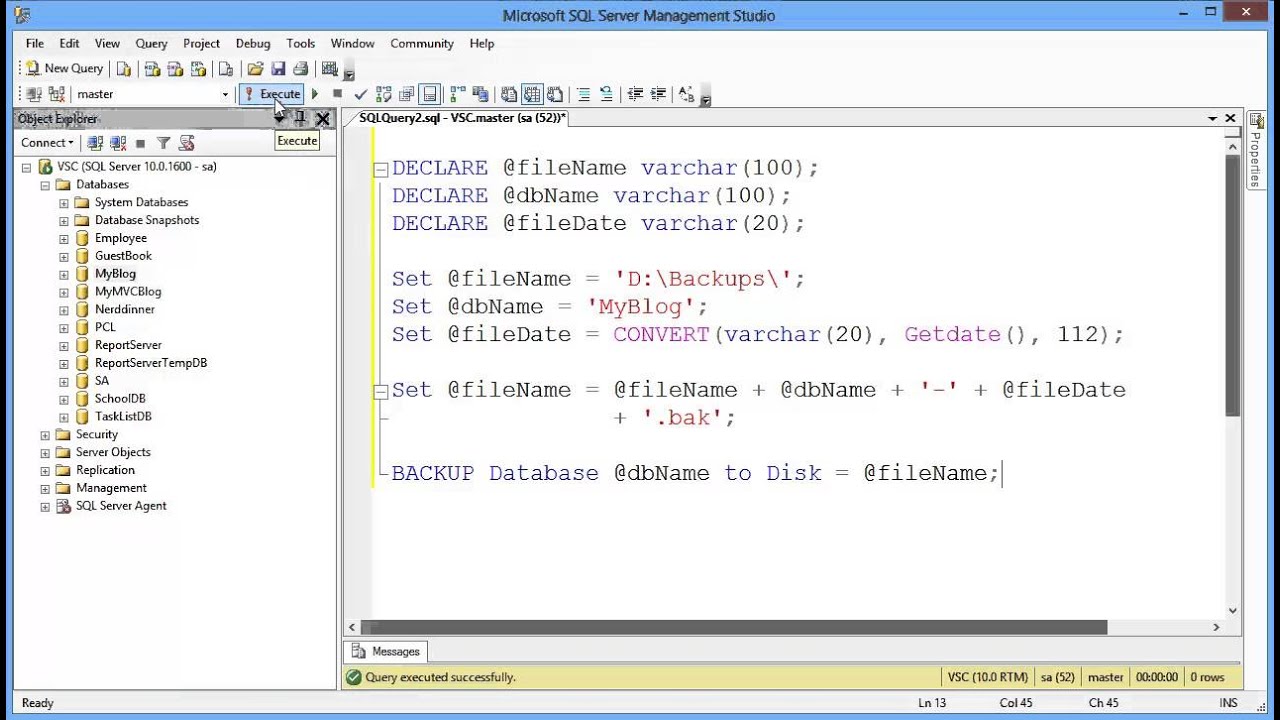
Step 3: Write the Backup Script
Now it’s time to write the backup script. The basic syntax for backing up a database in SQL Server is as follows:
BACKUP DATABASE [DatabaseName] TO DISK = 'C:\Backup\BackupFile.bak'
Replace “DatabaseName” with the name of the database you want to backup and “C:\Backup\BackupFile.bak” with the location where you want to save the backup file.
Step 4: Execute the Backup Script
After you have written the backup script, execute it by clicking the “Execute” button in the toolbar or by pressing F5 on your keyboard. SQL Server will then create a backup of the specified database and save it to the specified location.
Step 5: Verify the Backup
Once the backup operation is complete, it’s important to verify that the backup was successful. You can do this by navigating to the location where you saved the backup file and checking that it exists and is not corrupted.
Conclusion
Backing up your database in SQL Server using a script is a simple and effective way to ensure the safety of your data. By following the steps outlined in this article, you can easily create regular backups of your database and protect against data loss. Remember to regularly schedule backups and store them in a secure location to mitigate any potential risks.
