Dmz Fortigate Configuration: A Step-by-Step Guide
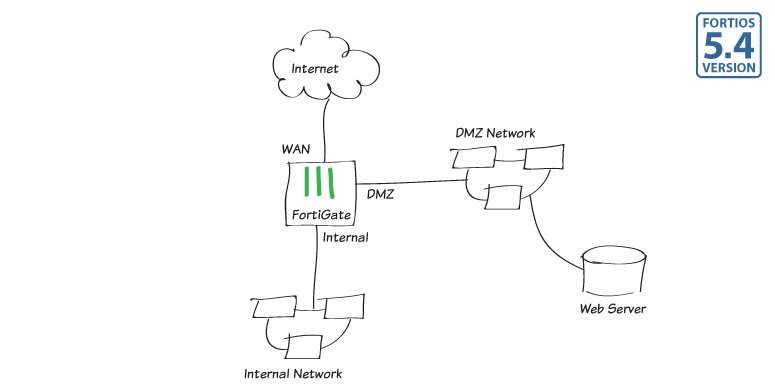
Setting up a DMZ (Demilitarized Zone) on your Fortigate firewall is a crucial step in ensuring the security of your network. In this article, we will walk you through the process of configuring your Fortigate firewall for DMZ.
Before we begin, make sure you have access to your Fortigate firewall’s web-based management interface. You will also need to have administrative privileges to make the necessary configuration changes.
Step 1: Create the DMZ Interface
The first step in setting up a DMZ on your Fortigate firewall is to create a new interface. This interface will be used to connect the devices in your DMZ to the firewall. To create the interface, follow these steps:
- Log in to your Fortigate firewall’s web-based management interface.
- Navigate to
System>Network>Interfaces. - Click on the
Interfacestab. - Click on the
Create Newbutton. - Enter a name for the interface (e.g., DMZ).
- Assign an IP address and subnet mask to the interface.
- Configure any other settings as needed.
- Click
OKto save the interface.
Step 2: Configure Firewall Policies
Once you have created the DMZ interface, the next step is to configure firewall policies to allow or block traffic to and from the DMZ. To create a firewall policy for your DMZ, follow these steps:
- Go to
Policy & Objects>IPv4 Policy. - Click on the
Create Newbutton. - Enter a name for the policy.
- Set the
Incoming Interfaceto the interface connected to your DMZ. - Set the
Outgoing Interfaceto the interface connected to your LAN. - Specify the source and destination addresses for the policy.
- Set the
ActiontoAlloworDenyas needed. - Click
OKto save the policy.
Step 3: Configure NAT Policies
If you need to translate the IP addresses of devices in your DMZ when they access the internet, you will need to configure NAT (Network Address Translation) policies. To create a NAT policy for your DMZ, follow these steps:
- Go to
Policy & Objects>NAT>IPv4 Policy. - Click on the
Create Newbutton. - Enter a name for the policy.
- Set the
Source Interfaceto the interface connected to your DMZ. - Set the
Destination Interfaceto the interface connected to the internet. - Specify the source and destination addresses for the policy.
- Set the
Translated SourceandTranslated Destinationaddresses as needed. - Click
OKto save the policy.
Step 4: Test the Configuration
Once you have completed the above steps, it is important to test the DMZ configuration to ensure that it is working as expected. You can test the configuration by trying to access a device in the DMZ from the internet or vice versa.
If the test is successful, congratulations! Your Fortigate firewall is now configured to maintain a secure DMZ. If you encounter any issues, double-check your configuration settings and consult the Fortigate documentation for further troubleshooting.
That’s it! You have successfully configured a DMZ on your Fortigate firewall. By following these steps, you can enhance the security of your network and protect your critical assets from external threats. Remember to regularly review and update your DMZ configuration to stay ahead of potential security risks.
