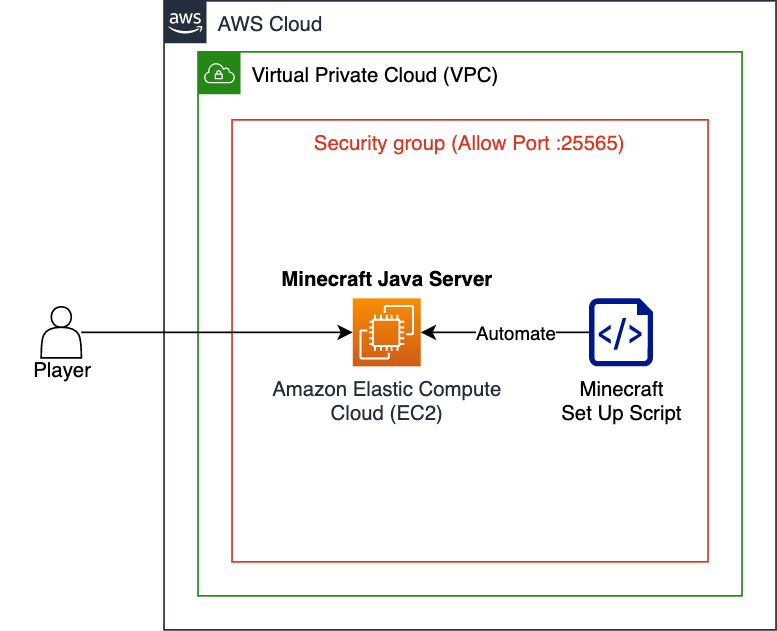
Running a Minecraft server on AWS (Amazon Web Services) is a great way to ensure a smooth gaming experience for you and your friends. AWS provides a reliable and scalable cloud infrastructure that can handle the demands of running a Minecraft server effortlessly.
Setting up a Minecraft server on AWS may seem like a daunting task, but with the right guidance, it can be a straightforward process. In this article, we will walk you through the steps to set up a Minecraft server on AWS, so you can start playing with your friends in no time.
Step 1: Create an AWS Account
The first step to setting up a Minecraft server on AWS is to create an AWS account. You can sign up for an AWS account on their website and follow the instructions to set up your account.
Once you have created your AWS account, you will have access to the AWS Management Console where you can manage your resources.
Step 2: Launch an EC2 Instance
After creating an AWS account, the next step is to launch an EC2 instance. EC2 is a web service that provides secure, resizable compute capacity in the cloud. You can think of an EC2 instance as a virtual server in the cloud.
To launch an EC2 instance, log in to your AWS Management Console, navigate to the EC2 dashboard, and click on the ‘Launch Instance’ button. Follow the prompts to select an Amazon Machine Image (AMI), choose an instance type, configure instance details, add storage, configure security groups, and review and launch your instance.
Step 3: Install Java and Minecraft Server
Once you have launched your EC2 instance, the next step is to install Java and the Minecraft server software.
To install Java, connect to your EC2 instance using SSH and run the following command:
sudo yum install java-1.8.0-openjdk
After installing Java, download the Minecraft server software on your EC2 instance. You can download the server software from the official Minecraft website by running the following command:
wget https://launcher.mojang.com/v1/objects/3dc3d84a581f14691199cf6831b71ed1296a9fdf/server.jar
Once you have downloaded the server software, you can start the Minecraft server by running the following command:
java -Xmx1024M -Xms1024M -jar server.jar nogui
Step 4: Configure Server Settings
With the Minecraft server up and running on your EC2 instance, the final step is to configure the server settings to your liking.
You can configure various settings in the ‘server.properties’ file located in the server directory. This file allows you to change game settings such as the server name, game mode, difficulty level, and more.
Once you have configured the server settings, you can invite your friends to join your Minecraft server by sharing the public IP address of your EC2 instance.
Conclusion
Setting up a Minecraft server on AWS is a rewarding experience that allows you to enjoy the game with your friends without worrying about server performance. By following the steps outlined in this article, you can create a reliable and scalable Minecraft server on AWS in no time.
