Apache SSL Certificate Configuration
Setting up SSL certificates on Apache can be a daunting task for beginners, but with the right guidance, it can be a relatively straightforward process. In this article, we will walk you through the steps to properly configure SSL certificates on your Apache web server.
What is an SSL Certificate?
Before we dive into the configuration process, let’s first understand what an SSL certificate is. SSL stands for Secure Sockets Layer, and it is a protocol that encrypts data exchanged between a user’s browser and the web server. An SSL certificate is a digital certificate that authenticates the identity of a website and encrypts information transmitted between the server and the user’s browser.
In simple terms, an SSL certificate ensures that the data exchanged between the server and the browser is secure and cannot be intercepted by malicious hackers.
Why Do You Need an SSL Certificate?
Having an SSL certificate is crucial for several reasons:
- Improved security: SSL encryption protects sensitive data such as personal information, credit card details, and login credentials from being intercepted by cybercriminals.
- Trust and credibility: Websites with SSL certificates display a padlock icon in the browser’s address bar, indicating that they are secure. This builds trust with users and enhances the credibility of your website.
- SEO benefits: Google considers SSL certificates as a ranking factor, so having one can improve your website’s search engine rankings.
Steps to Configure SSL Certificates on Apache
Now that you understand the importance of SSL certificates, let’s get started with the configuration process on Apache.
Step 1: Install Apache
If you haven’t already installed Apache on your server, you will need to do so before configuring SSL certificates. You can install Apache using the following command:
sudo apt-get install apache2
Once Apache is installed, you can proceed with the SSL certificate configuration.
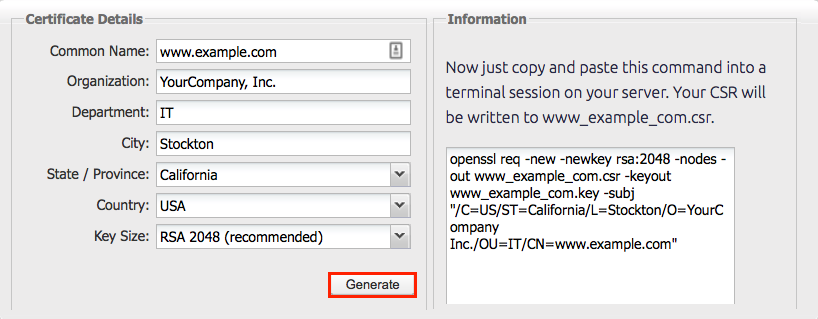
Step 2: Generate a Certificate Signing Request (CSR)
The next step is to generate a Certificate Signing Request (CSR) for your SSL certificate. You can generate a CSR using the following command:
openssl req -new -key server.key -out server.csr
Make sure to replace server.key with the filename of your private key file.
Step 3: Purchase an SSL Certificate
Once you have generated the CSR, you will need to purchase an SSL certificate from a trusted Certificate Authority (CA). You can choose from various types of SSL certificates, such as Domain Validated (DV), Organization Validated (OV), or Extended Validation (EV) certificates.
After purchasing the SSL certificate, you will receive a certificate file from the CA.
Step 4: Configure Apache for SSL
Now it’s time to configure Apache to use the SSL certificate. You can do this by editing the Apache configuration file, usually located at /etc/apache2/sites-available/default-ssl.conf.
Open the configuration file in a text editor and add the following lines:
SSLEngine on
SSLCertificateFile /path/to/your-domain.crt
SSLCertificateKeyFile /path/to/your-domain.key
Make sure to replace /path/to/your-domain.crt and /path/to/your-domain.key with the paths to your SSL certificate and private key files, respectively.
Save the configuration file and restart Apache to apply the changes.
Step 5: Test the SSL Configuration
Once you have configured Apache for SSL, you should test the configuration to ensure that everything is working correctly. You can do this by accessing your website using https:// in the URL.
If the SSL certificate is configured correctly, you should see a padlock icon in the browser’s address bar, indicating that the connection is secure.
Conclusion
Configuring SSL certificates on Apache is a crucial step in securing your website and protecting sensitive data. By following the steps outlined in this article, you can ensure that your website is safe and trustworthy for your users.