How to Create an Email Alias in Exchange
Creating email aliases in Exchange can be a useful tool for organizing your inbox and managing multiple email addresses. An email alias is a way to receive emails without creating a separate email account. Follow these simple steps to create an email alias in Exchange:
Step 1: Log in to Your Exchange Account
First, log in to your Exchange account using your email address and password. Once you are logged in, navigate to the settings or preferences section of your account.
Step 2: Access the Email Alias Settings
Look for the option to create an email alias in the settings menu. This option is usually located under the “Account Settings” or “Profile Settings” tab.
Step 3: Create a New Email Alias
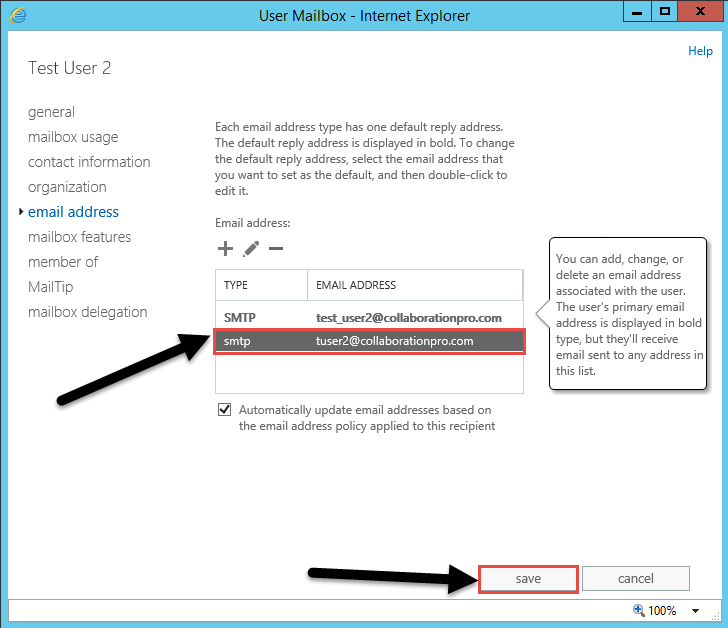
Click on the option to create a new email alias. You will be prompted to enter the desired alias and select the email address to which you want the alias to be associated.
Make sure to choose a unique alias that is easy to remember and related to the purpose of the email address. Avoid using special characters or spaces in the alias name.
Step 4: Confirm and Save the Email Alias
After entering the alias name and selecting the associated email address, click on the save or confirm button to create the email alias. You may be required to verify your identity before the alias is successfully created.
Step 5: Start Using Your Email Alias
Once the email alias is created, you can start using it to send and receive emails. Incoming emails sent to the alias will be delivered to the associated email address in your Exchange account.
Benefits of Using Email Aliases
- Organize your inbox by creating separate aliases for different purposes.
- Protect your primary email address from spam and unwanted emails.
- Manage multiple email addresses without the need for separate accounts.
- Personalize your email communication with unique aliases for different contacts or services.
Creating email aliases in Exchange is a simple and effective way to streamline your email communication and enhance your email management experience. Follow these steps to create an email alias today!
