How to Add Zimbra Email to Outlook
If you are looking to access your Zimbra email from Outlook, you’re in luck! Zimbra provides a straightforward process to integrate your email account with Outlook, making it easier for you to manage all your emails in one place. Follow the steps below to add your Zimbra email to Outlook effortlessly.
Step 1: Enable IMAP/POP in Zimbra
Before you can add your Zimbra email account to Outlook, you need to enable IMAP or POP access in your Zimbra settings. Here’s how you can do it:
- Login to your Zimbra account
- Go to Settings
- Click on Accounts
- Enable IMAP or POP access
Step 2: Add Zimbra Account to Outlook
Now that you have enabled IMAP or POP access in your Zimbra account, it’s time to add it to Outlook. Follow these steps:
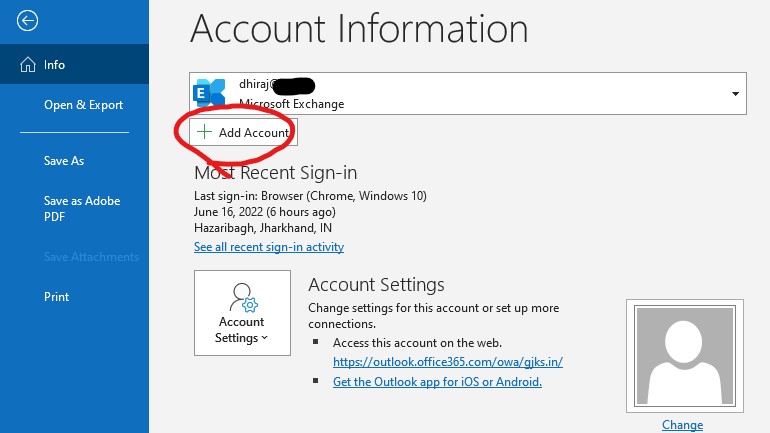
- Open Outlook
- Go to File > Info > Add Account
- Enter your Zimbra email address and password
- Choose IMAP or POP as the account type
- Enter the incoming and outgoing mail server settings (you can find this information in your Zimbra account settings)
Step 3: Test the Connection
Once you have added your Zimbra email account to Outlook, it’s essential to test the connection to ensure everything is set up correctly. Send a test email and see if it goes through successfully. If you encounter any issues, double-check your settings and try again.
Benefits of Adding Zimbra Email to Outlook
Integrating your Zimbra email with Outlook offers several benefits, including:
- Centralized email management
- Access to advanced Outlook features
- Improved productivity with all emails in one place
By following these simple steps, you can easily add your Zimbra email to Outlook and enjoy seamless email management across platforms. Stay connected and organized with this convenient integration!
