How to Set Up an SPF Record
Sending emails from your domain can sometimes be difficult. Your emails might end up in the spam folder or not even get delivered at all. This is where setting up an SPF record comes into play. In this article, we’ll guide you through the process of creating an SPF record to improve the deliverability of your emails.
What is an SPF Record?
SPF stands for Sender Policy Framework. It is a DNS record that helps prevent email spoofing and protects your domain from being used for malicious purposes. By creating an SPF record, you can specify which IP addresses are allowed to send emails on behalf of your domain.
When an email is sent from your domain, the recipient’s email server checks the SPF record to verify if the sender is authorized to send emails from that domain. If the IP address matches the ones specified in the SPF record, the email is more likely to be delivered successfully.
How to Create an SPF Record
- Log in to your domain hosting provider’s account.
- Find the DNS management section.
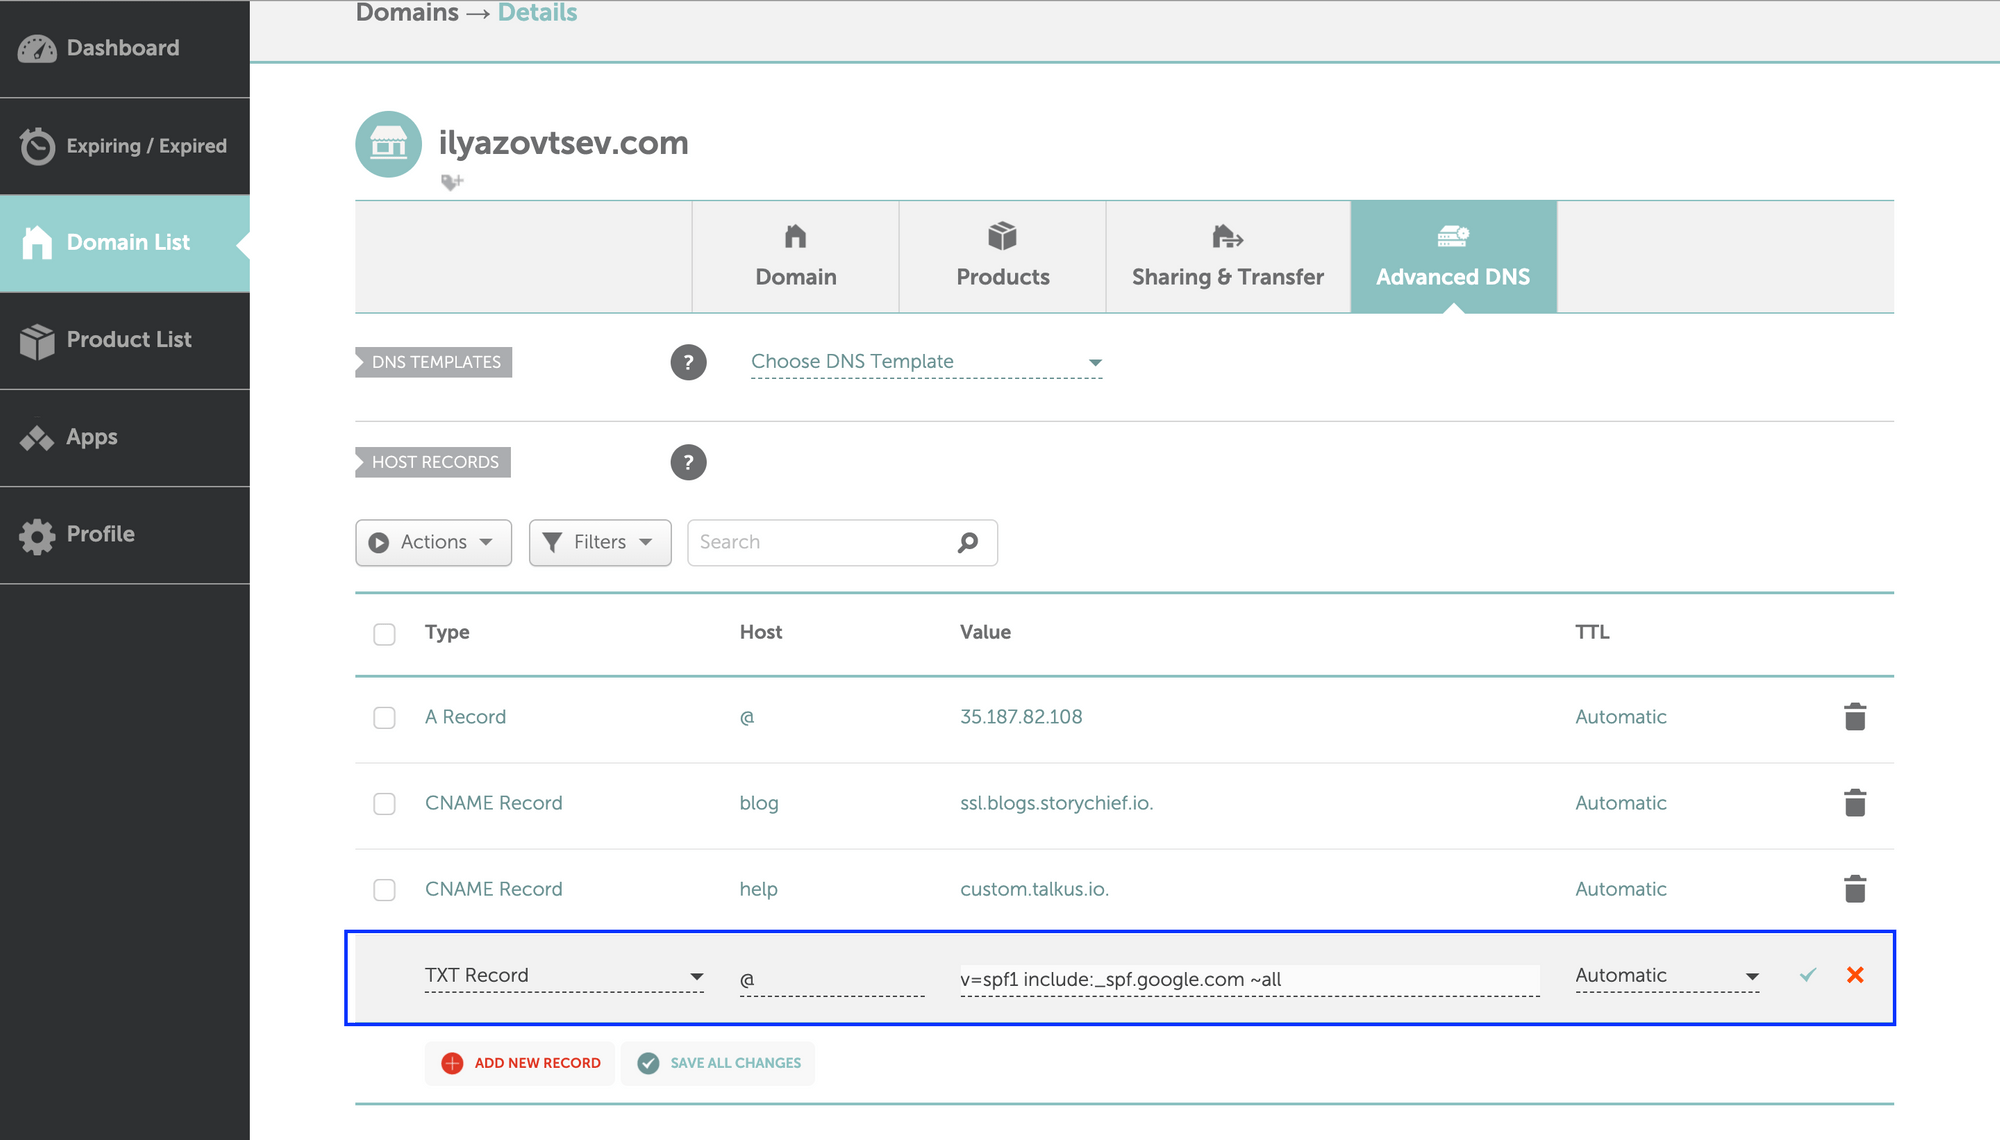
- Locate the option to add a new TXT record.
- Enter the TXT value for your SPF record.
- Save the changes and wait for the DNS to propagate.
Creating an SPF record is a simple process, but it is essential to ensure that you enter the correct information. Here’s a step-by-step guide to help you set up an SPF record for your domain:
Step 1: Log in to Your Domain Hosting Provider’s Account
First, log in to your domain hosting provider’s account. This is where you will access your domain’s DNS settings to make changes to your SPF record.
Step 2: Find the DNS Management Section
Once you’re logged in, navigate to the DNS management section. This is where you can view and edit the DNS records associated with your domain.
Step 3: Locate the Option to Add a New TXT Record
Look for the option to add a new TXT record. This is where you will enter the SPF information for your domain.
Step 4: Enter the TXT Value for Your SPF Record
Enter the TXT value for your SPF record. The SPF syntax contains mechanisms and qualifiers that specify which IP addresses are allowed to send emails from your domain. Make sure to use the correct syntax and double-check for any errors.
Step 5: Save the Changes and Wait for the DNS to Propagate
Once you’ve entered the SPF information, save the changes. It may take some time for the DNS changes to propagate across the internet. Be patient and monitor the status of your SPF record to ensure it is set up correctly.
Conclusion
Setting up an SPF record is a crucial step in improving the deliverability of your emails and protecting your domain from being used for malicious purposes. By following the steps outlined in this article, you can create an SPF record that will help ensure your emails reach their intended recipients successfully.
Remember to periodically review and update your SPF record to account for any changes in your email sending infrastructure. This will help maintain the security and reliability of your email communications.
