How to Authenticate DKIM
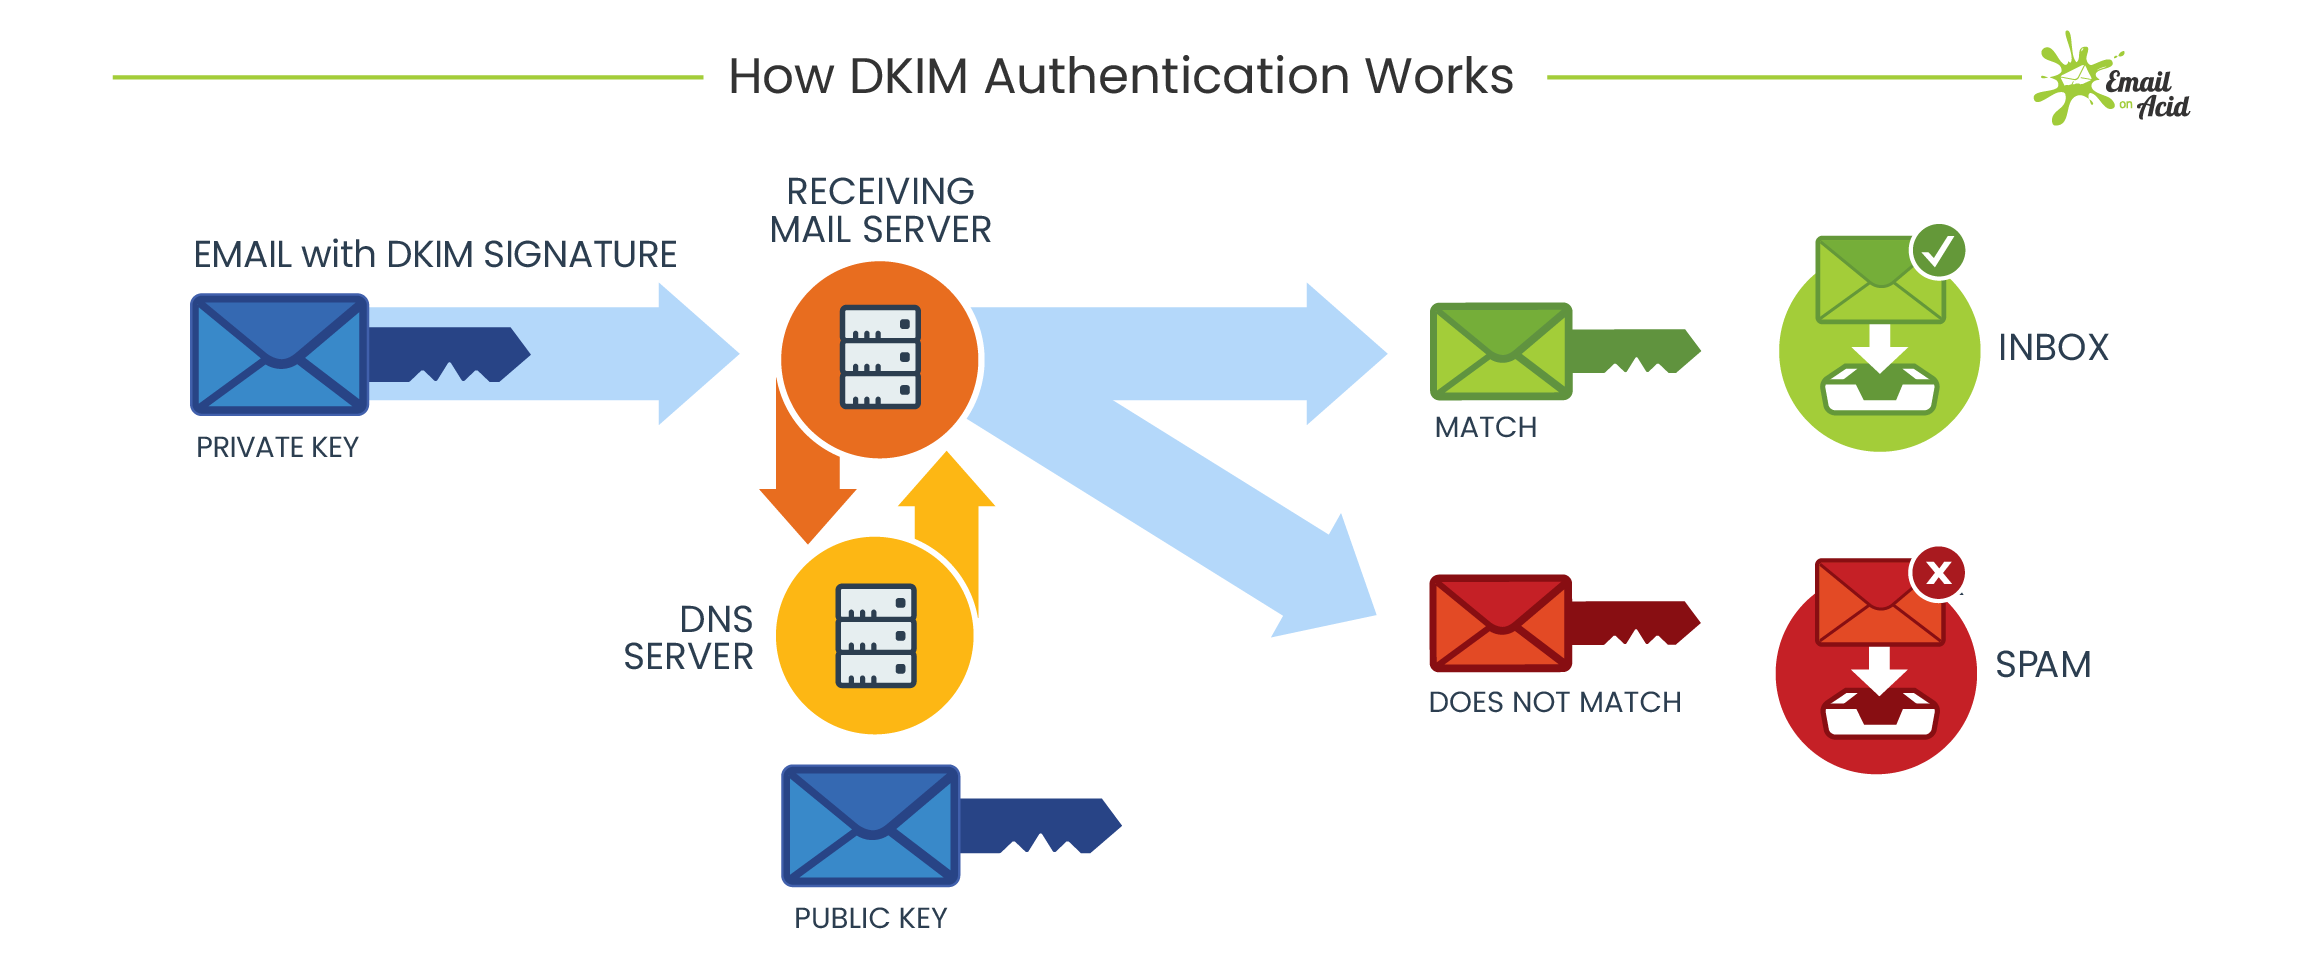
DomainKeys Identified Mail (DKIM) is a method used to authenticate emails to ensure they are not forged or altered during transit. By implementing DKIM, senders can add a unique signature to their emails, which can be verified by the recipient’s mail server. This helps to prevent phishing attacks and maintain the integrity of email communication.
Authenticating DKIM involves configuring your domain’s DNS settings to publish encryption keys that can be used to verify the origin and integrity of your emails. Below, we’ll outline the steps to authenticate DKIM on your domain:
Step 1: Generate DKIM Keys
The first step in authenticating DKIM is to generate public and private encryption keys. These keys are unique to your domain and are used to create a digital signature for your emails. You can generate DKIM keys using your email service provider or a DKIM key generation tool.
Once you have generated the keys, you will receive a public key, which you will add to your domain’s DNS records, and a private key, which you will keep secure on your email server.
Step 2: Add DKIM Records to DNS
After generating the DKIM keys, the next step is to add DKIM records to your domain’s DNS settings. These records include the public key generated in the previous step and are used by recipient mail servers to verify the authenticity of your emails.
To add DKIM records to your DNS, log in to your domain registrar or DNS provider’s website and access your domain’s DNS settings. Add a new DKIM record and paste the public key provided by your email service provider or DKIM key generation tool.
Step 3: Test DKIM Authentication
Once you have added the DKIM records to your domain’s DNS, it’s essential to test the authentication process to ensure everything is set up correctly. There are various online tools available that can help you test your DKIM configuration and verify that your emails are being authenticated successfully.
Send a test email to an email address that can be used to check the DKIM signature. The recipient should be able to view the DKIM signature in the email headers, confirming that the authentication is working as expected.
Step 4: Monitor DKIM Authentication
After implementing DKIM authentication, it’s crucial to monitor the process regularly. Keep an eye on your email deliverability rates and check for any DKIM authentication failures in your email server logs. Monitoring DKIM authentication will help you detect any issues early and resolve them quickly to ensure the security of your email communication.
By following these steps to authenticate DKIM on your domain, you can enhance the security of your email communication and protect your recipients from phishing attacks. Implementing DKIM is a crucial step in ensuring the authenticity and integrity of your emails, and it is worth the effort to secure your email communication.
