How to Create a Relational Database in phpMyAdmin
Creating a relational database in phpMyAdmin is not as daunting as it may seem. With the right guidance and a clear understanding of the steps involved, you can easily set up a relational database to organize and manage your data efficiently.
Follow these steps to create a relational database in phpMyAdmin:
Step 1: Accessing phpMyAdmin
The first step is to access phpMyAdmin, which is a free and open-source tool for managing MySQL and MariaDB databases. You can usually access phpMyAdmin through your web hosting control panel, such as cPanel or Plesk.
Once you have logged in to phpMyAdmin, you will see a list of databases on the left side of the screen. Click on “Databases” to create a new database.
Step 2: Creating a New Database
To create a new database, simply click on the “New” button on the top menu. Enter a name for your new database and select the default collation. Click on the “Create” button to create the database.
It is important to choose a descriptive name for your database to make it easier to manage and navigate as you add tables and relationships.
Step 3: Creating Tables
Once you have created your database, you can start creating tables to store your data. Click on the name of your database in the left sidebar and then click on the “Structure” tab.
Click on the “Create Table” button to add a new table to your database. Enter the name of the table, the number of columns, and the data type for each column. You can also set primary keys, indexes, and auto-increment options for each column.
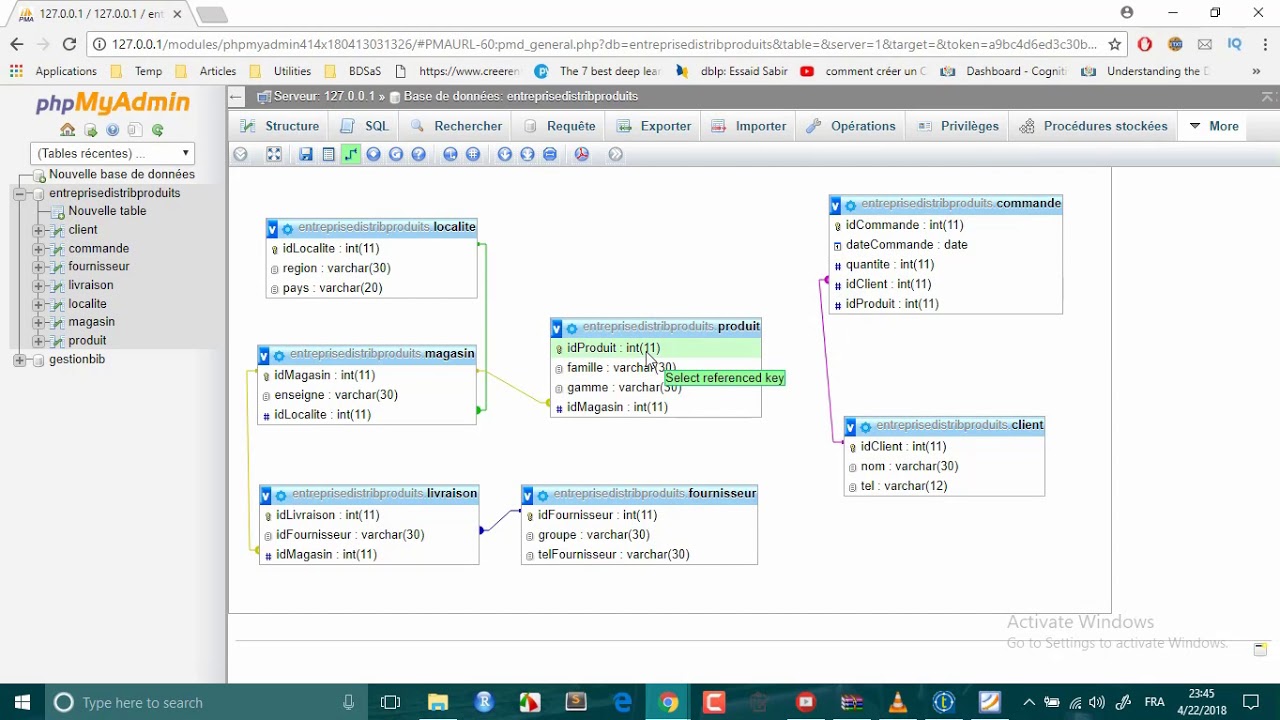
Step 4: Defining Relationships
One of the key features of a relational database is the ability to define relationships between tables. This allows you to link related data across different tables and retrieve information more efficiently.
To define a relationship between two tables, you need to use foreign keys. In phpMyAdmin, you can do this by clicking on the “Relation View” tab when viewing a table structure. Here, you can define the foreign key constraints and link the tables based on common columns.
Step 5: Adding Data
Once you have created your tables and defined the relationships between them, you can start adding data to your database. Click on the “Insert” tab to add new records to your tables.
Enter the data for each column in the table and click on the “Go” button to insert the record. You can continue adding more records as needed to populate your tables with the required data.
Step 6: Querying the Database
Once your relational database is set up and populated with data, you can start querying the database to retrieve information. Use SQL queries to retrieve, update, and delete data from your tables based on specific criteria.
phpMyAdmin provides a visual interface for writing and executing SQL queries, making it easier for beginners to work with databases. You can also export and import data, manage user permissions, and perform other administrative tasks through phpMyAdmin.
By following these steps, you can create a relational database in phpMyAdmin and start organizing your data in a structured and efficient manner. Remember to plan your database design carefully, define relationships between tables, and populate your tables with relevant data to make the most of your relational database.