DNS Server Configuration in CentOS 7
Setting up a DNS (Domain Name System) server in CentOS 7 can seem like a daunting task, but don’t worry, we’ve got you covered. In this article, we will walk you through the step-by-step process of configuring a DNS server on your CentOS 7 machine.
Step 1: Install Bind Packages
The first step in setting up a DNS server is to install the necessary packages. In CentOS 7, the default DNS server package is Bind (Berkeley Internet Name Domain). To install Bind, open the terminal and run the following command:
sudo yum install bind bind-utils
Once the installation is complete, you can now start configuring your DNS server.
Step 2: Configure Bind
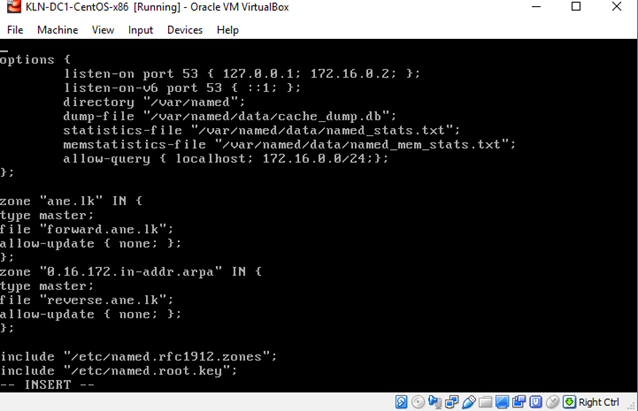
The configuration file for Bind is located at /etc/named.conf. Open this file in a text editor such as vi or nano. This file contains all the necessary configurations for your DNS server. Here are some key configurations you may need to modify:
- acl
- options
- zone
Make sure to save the changes after modifying the configuration file.
Step 3: Start and Enable Bind Service
After configuring Bind, you need to start and enable the service so that it starts automatically every time the system boots. Run the following commands:
sudo systemctl start named
sudo systemctl enable named
Now your DNS server is up and running!
Step 4: Firewall Configuration
Don’t forget to configure your firewall to allow DNS traffic. In CentOS 7, you can use the following commands to allow DNS traffic:
sudo firewall-cmd --permanent --add-service=dns
sudo firewall-cmd --reload
With this step, your DNS server should now be accessible from other machines on your network.
Step 5: Testing Your DNS Server
To test if your DNS server is working correctly, you can use tools like nslookup or dig. Run the following command to test the DNS resolution:
nslookup example.com
If everything is configured correctly, you should see the IP address of the domain you queried.
Conclusion
Setting up a DNS server in CentOS 7 may seem complex at first, but by following the steps outlined in this article, you can easily configure your own DNS server. Remember to keep your configurations updated and regularly test your DNS server to ensure smooth operation.
Happy DNS configuring!
