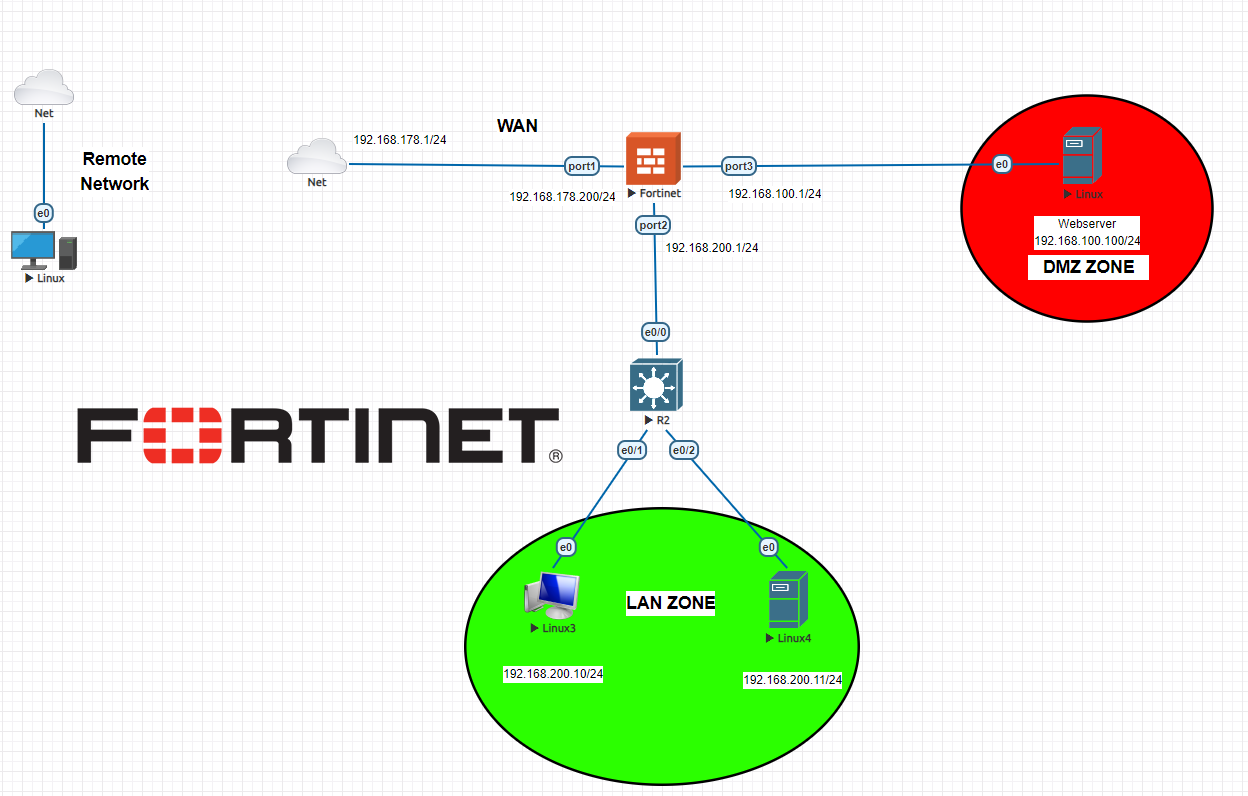
Fortigate: How to Setup DMZ
Setting up a demilitarized zone (DMZ) on your Fortigate firewall is an essential step in securing your network. It allows you to isolate and protect sensitive servers and resources from the public internet while still allowing controlled access. In this guide, we will walk you through how to configure a DMZ on your Fortigate firewall.
Step 1: Create a New Interface
The first step in setting up a DMZ on your Fortigate firewall is to create a new interface for the DMZ. This interface will act as a separate network segment for your DMZ servers. To create a new interface, follow these steps:
- Log in to your Fortigate firewall’s web interface.
- Go to the Network > Interfaces section.
- Click on the Create New button.
- Enter a name for the new interface (e.g., DMZ).
- Configure the interface settings, including IP address, subnet mask, and security level.
- Click OK to save the new interface.
Step 2: Configure Firewall Policies
Once you have created the DMZ interface, you will need to configure firewall policies to control traffic between the DMZ and other network segments. To do this, follow these steps:
- Go to the Policy & Objects > IPv4 Policy section.
- Click on the Create New button.
- Set the incoming interface to the DMZ interface and the outgoing interface to the internal network interface.
- Configure the source and destination addresses as needed.
- Set the action to allow and enable logging if desired.
- Click OK to save the firewall policy.
Step 3: Configure NAT Policies
In addition to firewall policies, you will also need to configure NAT policies to allow traffic to flow between the DMZ and the internet. To create a NAT policy, follow these steps:
- Go to the Policy & Objects > IPv4 Policy section.
- Click on the Create New button.
- Set the incoming interface to the DMZ interface and the outgoing interface to the WAN interface.
- Configure the source and destination addresses as needed.
- Set the destination interface to the DMZ interface.
- Click OK to save the NAT policy.
Step 4: Test the DMZ Configuration
After configuring the DMZ interface, firewall policies, and NAT policies, it is important to test the configuration to ensure that traffic is flowing correctly. You can test the DMZ configuration by attempting to access DMZ servers from the internal network and the internet and monitoring the traffic logs for any issues.
By following these steps, you can successfully set up a DMZ on your Fortigate firewall to enhance the security of your network and protect your critical assets from external threats.
