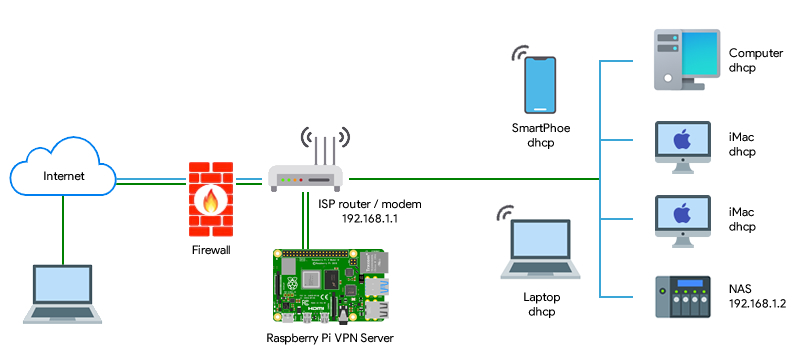
Setting up a VPN on a Raspberry Pi
Interested in setting up your own VPN on a Raspberry Pi? Look no further! In this guide, we will walk you through the process of installing and configuring a VPN on your Raspberry Pi device.
What is a VPN?
A VPN, or Virtual Private Network, is a technology that creates a secure connection over the internet. It encrypts your internet traffic and tunnels it through a remote server, protecting your data and privacy online.
Why use a VPN on a Raspberry Pi?
Using a VPN on a Raspberry Pi can offer several benefits, including:
- Enhanced security and privacy
- Access to geo-restricted content
- Bypassing censorship
- Protection on public Wi-Fi networks
Installing a VPN server on Raspberry Pi
There are several VPN server software options available for Raspberry Pi, such as OpenVPN, WireGuard, and PiVPN. In this guide, we will focus on setting up OpenVPN for its versatility and popularity.
Step-by-step guide to setting up OpenVPN on Raspberry Pi
Here is a detailed guide on how to set up OpenVPN on your Raspberry Pi:
1. Install OpenVPN
First, log in to your Raspberry Pi and update the package lists. Then, install OpenVPN by running the following command:
sudo apt-get install openvpn
2. Configure OpenVPN
Next, configure OpenVPN by creating a new configuration file. Copy the default configuration file to a new location:
sudo cp /usr/share/doc/openvpn/examples/sample-config-files/server.conf.gz /etc/openvpn/
Then, unzip the configuration file:
sudo gunzip /etc/openvpn/server.conf.gz
Now, edit the configuration file with your desired settings:
sudo nano /etc/openvpn/server.conf
3. Generate Diffie-Hellman key exchange
Run the following command to generate the Diffie-Hellman key exchange:
sudo openssl dhparam -out /etc/openvpn/dh2048.pem 2048
4. Start OpenVPN
Start the OpenVPN service by running the following command:
sudo systemctl start openvpn@server
To ensure that OpenVPN starts on boot, run:
sudo systemctl enable openvpn@server
5. Configure firewall settings
Configure the firewall settings to allow VPN traffic. Run the following commands:
sudo iptables -t nat -A POSTROUTING -s 10.8.0.0/24 -o eth0 -j MASQUERADE
sudo iptables-save > /etc/iptables/rules.v4
Connecting to your VPN
Once you have set up the VPN server on your Raspberry Pi, you can connect to it using an OpenVPN client on your device. Import the client configuration file and connect to the VPN server with your credentials.
Conclusion
Setting up a VPN on a Raspberry Pi is a great way to enhance your online security, privacy, and access to restricted content. Follow this guide to create your own VPN server and enjoy a secure internet browsing experience.
