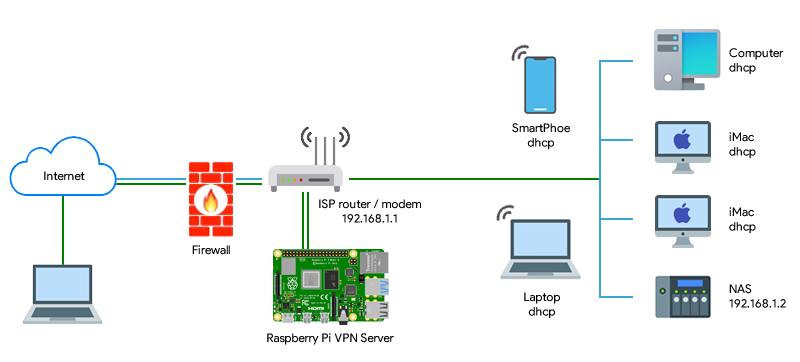
How to Setup a VPN Server at Home with Raspberry Pi
Are you looking to improve your online privacy and security? Setting up your own VPN server at home with a Raspberry Pi is a great way to achieve that. In this guide, we will walk you through the steps to create your personal VPN server using a Raspberry Pi.
What is a VPN Server?
A VPN (Virtual Private Network) server allows you to securely connect to the internet and browse anonymously by encrypting your internet connection. It acts as a secure tunnel between your device and the internet, keeping your data safe from prying eyes.
Why Use Raspberry Pi for a VPN Server?
Raspberry Pi is a small, affordable, and energy-efficient computer that you can use to create all kinds of projects. Setting up your VPN server on a Raspberry Pi not only saves you money but also allows you to have full control over your VPN server’s configuration.
Requirements
- Raspberry Pi (Model 3 or above recommended)
- Raspberry Pi power supply
- MicroSD card
- Ethernet cable
- External storage (optional)
Steps to Setup VPN Server at Home with Raspberry Pi
Step 1: Install Raspbian Operating System
Start by installing the Raspbian operating system on your Raspberry Pi. You can download the latest version of Raspbian from the Raspberry Pi Foundation’s website and follow their installation instructions.
Step 2: Update and Upgrade Packages
Once Raspbian is installed, open the terminal and run the following commands to update and upgrade the packages:
sudo apt update
sudo apt upgrade
Step 3: Install OpenVPN
Next, install OpenVPN on your Raspberry Pi by running the following command:
sudo apt install openvpn
Step 4: Configure OpenVPN
Now that OpenVPN is installed, you need to configure it. Follow the OpenVPN documentation to set up a VPN server on your Raspberry Pi.
Step 5: Generate Client Configuration
Generate the client configuration files for your devices to connect to the VPN server. You can do this by running the following command:
sudo bash /etc/openvpn/easy-rsa/easyrsa gen-req client1 nopass
Step 6: Start OpenVPN Service
Start the OpenVPN service on your Raspberry Pi using the following command:
sudo systemctl start openvpn@server
Step 7: Connect to Your VPN Server
Now you can connect to your VPN server using the client configuration files you generated earlier. Enjoy secure and private browsing from anywhere in the world!
Conclusion
Setting up a VPN server at home with a Raspberry Pi is a fun and rewarding project that can greatly enhance your online privacy and security. Follow the steps outlined in this guide, and start enjoying a safer internet browsing experience today!
