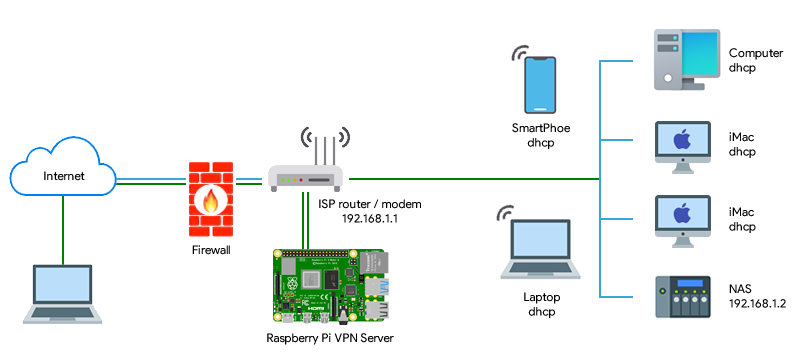
Setting Up a VPN Server on Raspberry Pi
If you’re looking to set up your own VPN server on a Raspberry Pi, you’ve come to the right place! In this guide, we’ll walk you through the process step by step so you can enjoy the benefits of a secure and private connection from the comfort of your own home.
Why Use a VPN Server?
Before we dive into the setup process, let’s quickly go over why you might want to use a VPN server in the first place. A VPN, or Virtual Private Network, encrypts your internet traffic and routes it through a secure server, protecting your online privacy and hiding your IP address from prying eyes.
By setting up your own VPN server on a Raspberry Pi, you can have full control over your data and ensure that your connection is always secure, whether you’re browsing the web, streaming videos, or accessing sensitive information.
What You’ll Need
- Raspberry Pi (any model will do)
- MicroSD card (at least 8GB)
- Power adapter
- Ethernet cable
- Keyboard and mouse
- Monitor with HDMI cable
- Internet connection
Setting Up the VPN Server
Now that you have everything you need, it’s time to set up your VPN server. Follow these steps:
Step 1: Install Raspbian OS
Start by downloading the latest version of Raspbian OS from the official Raspberry Pi website. Write the image to your microSD card using a tool like Etcher, insert the card into your Raspberry Pi, and power it on.
Step 2: Update and Upgrade
Once Raspbian is up and running, open a terminal and run the following commands to update and upgrade the system:
sudo apt update
sudo apt upgrade
Step 3: Install OpenVPN
Next, install the OpenVPN software on your Raspberry Pi by running the following command:
sudo apt install openvpn
Step 4: Configure OpenVPN
After the installation is complete, navigate to the OpenVPN directory and copy the sample configuration files to the /etc/openvpn directory:
cd /usr/share/doc/openvpn/examples/sample-config-files
sudo cp server.conf.gz /etc/openvpn/
sudo gzip -d /etc/openvpn/server.conf.gz
Step 5: Generate Keys and Certificates
Run the following command to generate the necessary keys and certificates:
sudo openvpn --genkey --secret /etc/openvpn/ta.key
Now you’re ready to configure the server and connect to your VPN from any device. Just make sure to forward the appropriate ports on your router to allow traffic to pass through.
Conclusion
Setting up a VPN server on a Raspberry Pi is a great way to enhance your online security and privacy. With just a few simple steps, you can create your own private network and protect your data from potential threats.
So what are you waiting for? Grab your Raspberry Pi and get started on setting up your very own VPN server today!
