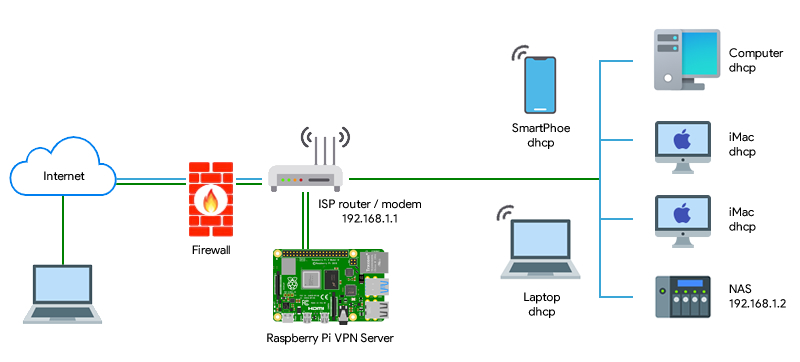
How to Setup VPN in Raspberry Pi
If you want to enhance the security and privacy of your Raspberry Pi, setting up a VPN (Virtual Private Network) is a great option. A VPN allows you to create a secure connection to another network over the internet, protecting your browsing activity from prying eyes.
In this guide, we will walk you through the steps to set up a VPN on your Raspberry Pi. Whether you’re a beginner or an experienced user, we’ve got you covered.
Step 1: Install OpenVPN
The first step is to install OpenVPN on your Raspberry Pi. OpenVPN is a popular open-source software that allows you to create a secure connection to a VPN server.
To install OpenVPN, open the terminal on your Raspberry Pi and run the following commands:
sudo apt update
sudo apt install openvpn
After the installation is complete, move on to the next step.
Step 2: Configure OpenVPN
Next, you need to configure OpenVPN to connect to a VPN server. You can either set up your own server or use a VPN service provider.
To configure OpenVPN, follow these steps:
- Download the configuration files from your VPN service provider.
- Copy the files to the
/etc/openvpn/directory. - Start the OpenVPN service by running
sudo systemctl start openvpn@config(replaceconfigwith the name of your configuration file).
Once OpenVPN is configured, you can connect to the VPN server by running sudo openvpn --config /etc/openvpn/config.ovpn in the terminal.
Step 3: Verify the Connection
To ensure that your VPN connection is working properly, you can check your IP address using websites like WhatIsMyIP. Your IP address should now be the same as the VPN server’s IP address.
Congratulations! You have successfully set up a VPN on your Raspberry Pi. Enjoy browsing the internet securely and privately.
Conclusion
Setting up a VPN on your Raspberry Pi is a simple and effective way to protect your online privacy. With a VPN, you can browse the internet securely and access geo-restricted content.
We hope this guide has helped you set up a VPN on your Raspberry Pi. If you have any questions or need further assistance, feel free to leave a comment below. Happy browsing!
