How to Debug Kernel Panic in Linux
Kernel panic is a critical issue that can cause your Linux system to become unresponsive, leaving you unable to access your files or applications. When faced with a kernel panic, it’s essential to remain calm and follow a step-by-step process to diagnose and resolve the problem. In this article, we will walk you through how to debug kernel panic in Linux and get your system back up and running smoothly.
What is Kernel Panic?
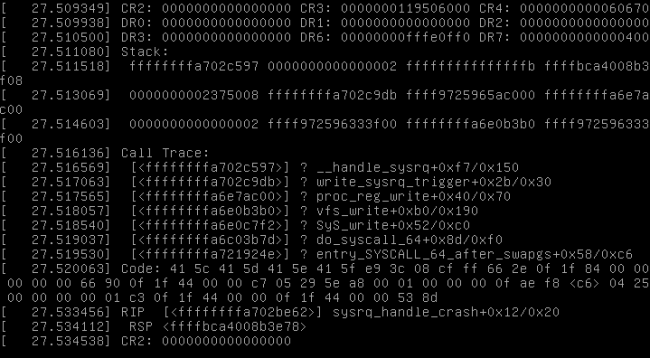
Kernel panic occurs when the Linux kernel encounters a fatal error that it cannot recover from. This can be caused by hardware issues, software bugs, or faulty configurations. When a kernel panic occurs, the system will halt, display an error message on the screen, and require a manual reboot to recover.
Step 1: Take Note of the Error Message
When a kernel panic occurs, the system will display an error message on the screen. It’s crucial to take note of this message as it provides valuable information about what caused the kernel panic. Look for any error codes, stack traces, or driver names mentioned in the message.
Step 2: Check System Logs
After rebooting your system, check the system logs for any additional information about the kernel panic. You can view the system logs using the dmesg or journalctl commands. Look for any error messages or warnings that may help identify the cause of the kernel panic.
Step 3: Review Recent Changes
If you recently made any changes to your system, such as installing new software or updates, these changes may have triggered the kernel panic. Review any recent changes and consider reverting them to see if the kernel panic resolves.
Step 4: Check Hardware
Kernel panics can also be caused by faulty hardware components such as RAM, hard drives, or network cards. Run hardware diagnostics tools to check for any hardware issues that may be triggering the kernel panic. Replace any faulty hardware components to resolve the issue.
Step 5: Update Drivers and Kernel
Outdated drivers or an old kernel version can sometimes lead to kernel panics. Make sure to update your system’s drivers and kernel to the latest versions available. This can help resolve any compatibility issues that may be causing the kernel panic.
Step 6: Enable Kernel Debugging
If you are still unable to identify the cause of the kernel panic, you can enable kernel debugging to gather more information about the issue. Follow the instructions in the Kernel documentation to enable kernel debugging and analyze the debugging output to pinpoint the root cause of the kernel panic.
Step 7: Seek Help from the Community
If you are unable to resolve the kernel panic on your own, don’t hesitate to seek help from the Linux community. Forums, mailing lists, and IRC channels dedicated to Linux can provide valuable insights and assistance in diagnosing and resolving kernel panic issues. Don’t be afraid to ask for help!
Conclusion
Kernel panic can be a stressful and frustrating experience, but with a systematic approach and the right tools, you can effectively debug and resolve the issue. By following the steps outlined in this article, you can identify the root cause of the kernel panic and take the necessary steps to prevent it from happening again in the future. Remember, patience and persistence are key when dealing with kernel panic issues in Linux.
