How to Use Cloudflare CDN
In today’s fast-paced digital world, website owners are constantly looking for ways to improve the performance of their websites. One way to achieve this is by leveraging Content Delivery Networks (CDNs) like Cloudflare. By distributing your website’s static content across multiple servers located in different geographic locations, CDNs can significantly reduce page load times and improve overall user experience.
If you’re new to using CDNs, don’t worry. In this article, we’ll walk you through the process of setting up and using Cloudflare CDN for your website. Let’s get started!
Step 1: Sign Up for a Cloudflare Account
The first step in using Cloudflare CDN is to sign up for an account. Simply visit the Cloudflare website and click on the “Sign Up” button. You’ll be prompted to enter your email address and choose a password. Once you’ve completed the sign-up process, you’ll have access to your Cloudflare dashboard where you can manage your CDN settings.
Step 2: Add Your Website to Cloudflare
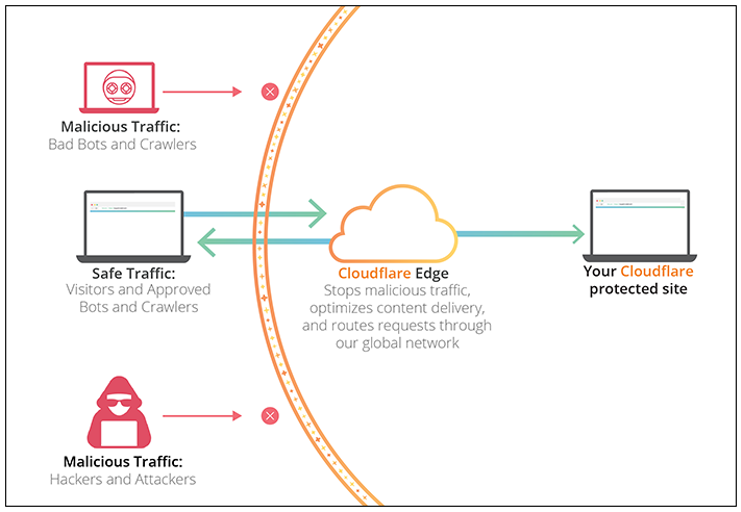
After creating your Cloudflare account, the next step is to add your website to the platform. In your dashboard, click on the “Add Site” button and enter your website’s domain name. Cloudflare will then scan your DNS records and provide you with a list of DNS settings. Update your domain’s nameservers to point to Cloudflare, and your website will now be protected and accelerated by Cloudflare CDN.
Step 3: Configure CDN Settings
Once your website is added to Cloudflare, you can start configuring your CDN settings to optimize performance. In your dashboard, navigate to the “Speed” tab and enable features like minification, Rocket Loader, and Always Online. These features will help reduce the size of your files, prioritize page rendering, and ensure your website stays online even during server outages.
Step 4: Monitor CDN Performance
After setting up your Cloudflare CDN, it’s important to regularly monitor its performance to ensure that your website is running smoothly. Cloudflare provides detailed analytics and reports that allow you to track your website’s traffic, bandwidth usage, and security threats. Use this information to make informed decisions about your CDN configuration and improve your website’s overall performance.
Step 5: Test Your Website’s Speed
Before and after implementing Cloudflare CDN, it’s a good idea to test your website’s speed to see the difference in performance. Use online tools like Google PageSpeed Insights or GTmetrix to analyze your website’s load times, page size, and other performance metrics. Compare the results to see how Cloudflare CDN has improved your website’s speed and user experience.
Conclusion
By following these steps and leveraging Cloudflare CDN, you can improve the performance and user experience of your website. With its easy setup process, advanced features, and detailed analytics, Cloudflare is a great option for website owners looking to optimize their online presence. Give Cloudflare CDN a try today and see the difference it can make for your website!
