Running a Windows Server on Proxmox: A Comprehensive Guide
Are you considering setting up a Windows Server on Proxmox but unsure about the process? Look no further! In this guide, we will walk you through the steps to successfully run a Windows Server on a Proxmox virtual environment.
What is Proxmox?
Proxmox Virtual Environment, also known as Proxmox VE, is an open-source virtualization management solution. It combines two virtualization technologies under one management platform: KVM (Kernel-based Virtual Machine) for virtual machines and LXC (Linux Containers) for lightweight, isolated containers. Proxmox VE provides users with a powerful yet easy-to-use interface to manage their virtual machines, storage, and networking resources.
Why Run a Windows Server on Proxmox?
Running a Windows Server on Proxmox offers several benefits, including:
- Cost-effectiveness: Proxmox VE is free to use, making it a budget-friendly choice for virtualization.
- Resource optimization: Proxmox VE allows for efficient utilization of resources, ensuring optimal performance for your Windows Server.
- Scalability: Proxmox VE supports the growth of your virtual environment, allowing you to easily scale up resources as needed.
Setting Up a Windows Server on Proxmox
Now, let’s dive into the steps to set up a Windows Server on Proxmox:
Step 1: Download Windows Server ISO
Start by downloading the Windows Server ISO file from the official Microsoft website. You will need this file to install Windows Server on your Proxmox virtual machine.
Step 2: Create a New Virtual Machine
Next, open the Proxmox web interface and create a new virtual machine. Select “Windows” as the operating system and attach the Windows Server ISO file you downloaded in Step 1.
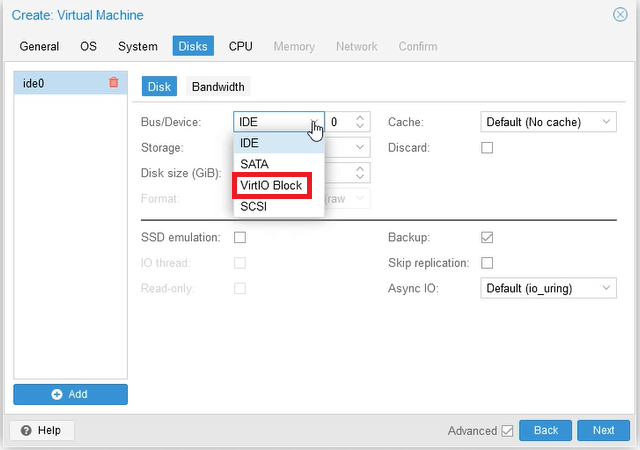
Step 3: Configure Virtual Machine Settings
Customize the virtual machine settings, including RAM, CPU, storage, and network options. Ensure that the configuration meets the requirements for running Windows Server.
Step 4: Install Windows Server
Start the virtual machine and follow the on-screen instructions to install Windows Server on Proxmox. Make sure to activate Windows and configure network settings as needed.
Conclusion
Congratulations! You have successfully set up a Windows Server on Proxmox. Enjoy the benefits of running a Windows Server in a cost-effective, scalable, and resource-optimized virtual environment.
Thank you for reading our guide. We hope you found it helpful in your journey to virtualization with Proxmox VE. Have a great day!
