Change Domain Controller IP Address: Step-by-Step Guide
Changing the IP address of your domain controller can be a daunting task, especially if you’re not sure where to start. But don’t worry, we’ve got you covered with this step-by-step guide to help you through the process.
Before we dive into the details, it’s important to understand why you might need to change the IP address of your domain controller. There could be various reasons for this, such as network restructuring, IP address conflicts, or simply a need to change the IP scheme. Whatever the reason, it’s crucial to follow the proper steps to ensure a smooth transition without any disruptions to your network.
Step 1: Preparation
Before you make any changes, it’s important to take some time to prepare for the IP address change. Here are a few key things to consider:
- Document the current IP address configuration of your domain controller, including the IP address, subnet mask, default gateway, and DNS servers.
- Identify any services or applications that rely on the current IP address of the domain controller.
- Notify your network team and any other relevant stakeholders about the upcoming IP address change.
Step 2: Changing the IP Address
Once you’ve completed the preparation steps, it’s time to actually change the IP address of your domain controller. Here’s how you can do it:
- Log in to the domain controller using administrative credentials.
- Open the Network and Sharing Center. Click on the Change adapter settings option.
- Locate the network adapter that corresponds to the domain controller’s current IP address.
- Right-click on the adapter and select Properties.
- Scroll down and select Internet Protocol Version 4 (TCP/IPv4), then click on Properties.
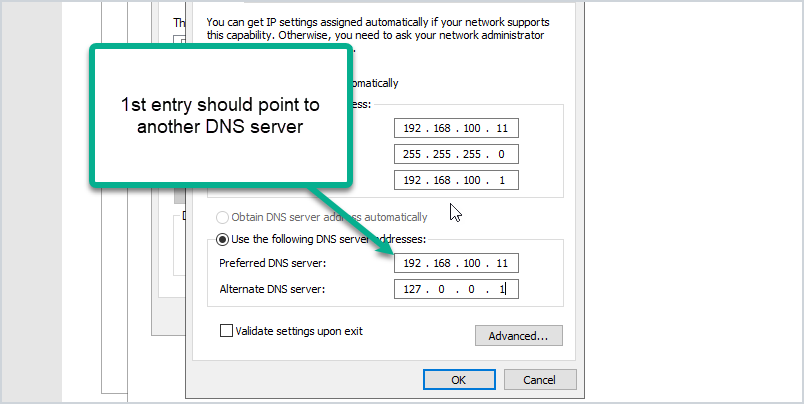
- Enter the new IP address, subnet mask, default gateway, and DNS servers as needed.
- Click OK to save the changes.
Step 3: Testing and Validation
After changing the IP address, it’s important to test and validate the new configuration to ensure everything is working as expected. Here are a few things you can do:
- Ping the domain controller from another machine to verify connectivity.
- Verify that all services and applications relying on the domain controller are functioning correctly.
If you encounter any issues during testing, you may need to troubleshoot and make adjustments to the IP address configuration.
Final Thoughts
Changing the IP address of your domain controller can seem like a complicated task, but with proper planning and execution, it can be done smoothly without any disruptions to your network. By following the steps outlined in this guide, you’ll be able to change the IP address of your domain controller with confidence.
If you need further assistance or have any questions, don’t hesitate to reach out to your network team or IT support. They will be able to provide additional guidance and support throughout the process.
